Intro lesson (ages 3-5)
“Hello!”
Lesson 1 Level 1 Age 3-5
Lesson plans for ESL kids teachers

Lesson 1
Intro lesson (ages 3-5)
This lesson plan will help you get your ESL kids course off to a great start with fun ‘getting to know each other’ games as well as activities to promote good classroom [hide_on_uk]behavior[/hide_on_uk][hide_on_us]behaviour[/hide_on_us].
Members get accompanying craft sheet, homework worksheet and songs.
Materials:
Our lesson plans are FREE!
Sign up for accompanying:
✔ worksheets
✔ homework sheets
✔ craft sheets
✔ flashcards
✔ PowerPoint lessons & multimedia
✔ song downloads & videos
✔ classroom readers & videos
Click to see lesson details, materials and supplies
Age: 3-5 years
Time: 40 mins – 1 hour
Objectives: Greetings, names, follow simple instructions, identify and recognize 3 [hide_on_uk]colors[/hide_on_uk][hide_on_us]colours[/hide_on_us].
Structures: “Hello”, “What’s your name”, “My name is…”, “Goodbye”, “Give me…”
Target vocabulary: red, blue, green, flower, stand up, sit down, hands up, hands down, jump, run, turn around, pass, touch.
Lesson materials
Printables:
- Name flower craft sheet
- Name tracing sheets (one for each student with their name in dots)
- [hide_on_uk]Color[/hide_on_uk][hide_on_us]Colour[/hide_on_us] the balloons worksheet
Songs:
- Hello song
- Goodbye song
Supplies:
- [hide_on_uk]colored[/hide_on_uk][hide_on_us]coloured[/hide_on_us] crayons / pencils
- name tags for each student
- a glove puppet
- a small ball
- 3 sheets of origami [hide_on_uk]colored[/hide_on_uk][hide_on_us]coloured[/hide_on_us] paper (red, green, blue)
- cushions (1 per student)
- device to play the songs on
This lesson provides a good platform to begin the course with your younger level learners as it introduces them to the key stages and routines you will use in every class. At this age some of your students may be a bit shy at first so make sure you smile a lot and make them feel really welcome – they will soon gain confidence as you run through all the fun activities in this lesson!
Lesson procedure:
Warm up and maintenance:
1. Greetings
Greet the students by name as they enter the classroom and gesture for them to sit down. It’s a good idea to have a cushion for each student (and parent if also taking part) as this makes sitting arrangements easy to [hide_on_uk]organize[/hide_on_uk][hide_on_us]organise[/hide_on_us]. Try and arrange the cushions beforehand spaced out in a fan-shape around you.
2. Name tags
Before class prepare some name tags (stickers or pin-on tags) with each student’s name written on in lower case letters. Sit down with your students and lay out the name tags in front of you. Pick up each tag and call out the name. Try and encourage each student to put their hand up and say “yes”. Hand over the tags and help to pin / stick on.
In later lessons, once your students can recognize their written name, you can have them pick out their own name tags.
New learning and practice:
1. Play “Ball pass” and say names
Take a soft ball and pass it to your nearest student, saying “Pass”. Have each student pass the ball around the circle. Next, hold the ball and say your name. Have each student say their name as they pass the ball to each other. Make sure they pass, not throw, roll, etc. If a student doesn’t pass make sure s/he does it again until done properly.
2. Introduce glove puppet – greetings and introductions activity
Your students will love this. Get hold of a glove puppet (I use Cookie Monster bought from Toys ‘R’ Us) and put it in a bag before class. Bring out the bag, open it enough to see in and shout into the bag “Hello!”. Then move your ear to the opening to listen – nothing. Go to each student and encourage them to shout “Hello” into the bag – each time nothing happens. Finally, get all the students together to shout “Hello!” at the same time. This time the puppet wakes up and jumps out of the bag! Then model the role play with the puppet:
Teacher: “Hello”, What’s your name?”
Puppet: “My name is…”.
Then move onto the first student and say “Hello”. Encourage him/her to say hello back. Let the students touch, cuddle and stroke the puppet. My puppet also likes to nibble their feet and arms. Next, the puppet asks each student: “What’s your name?”. If they are old enough try and encourage “My name is…” but for the really little ones (3 and under) just saying their name is fine. Finally, go around saying “Goodbye” and “See you” before going back into the bag and back to sleep.
3. Sing the “Hello song”
Sit in a circle and listen to the song (clap along or pat knees). Play it once more emphasizing “Hello”. Your students will pick up the words surprisingly quickly.
Lyrics for the “Hello song”
Hello, hello,
How are you today?
Hello, hello,
How are you today?
I’m fine, thank you,
I’m fine, thank you,
I’m fine, thank you,
And how about you?
Hello, hello,
How are you today?
I’m fine, thank you,
And how about you?
Gestures for the “Hello song”
These are quite straight forward. First time you play the song do the gestures and encourage everyone to do them with you.
- Wave as you sing the “Hello, hello” parts.
- Gesture to others as you sing, “How are you today?”
- Point to yourself as you sing, “I’m fine, thank you”
- Hand gesture towards another student as you sing, “And how about you?”.
[hide_on_uk]Short sample (members get full-length song):
[/hide_on_uk]
[hide_on_us]Short sample (members get full-length song):
[/hide_on_us]
4. Do “Exercise routine” activity
Time for some action. Say the following and have the students follow your lead:
- “Stand up” (Teacher stands and so does everyone else)
- “Hands up / hands down” (do 4 or 5 times)
- “Jump” (4 or 5 times)
- “Run! / Stop!” (4 or 5 times)
- “Turn around! / Stop!” (4 or 5 times)
- finally “Sit down”.
5. Name writing practice
In this lesson your students are going to practice writing their names. For really young ones, this may be their first time to do so – don’t worry if their first effort is a scrawly mess – always encourage and praise.
You will need to prepare a writing sheet for each student before class with their name written in dots for them to practice tracing their names (also prepare one for yourself so you can model the task). You can either make these yourself (hand draw the dots for each name) or use a font typed into a Word document – we like to use the “National First Font Dotted” font (you can download it for free here: http://www.fontspace.com/roger-white/national-first-font-dotted).
Prepare the sheets something like this:
Make a few extra copies of each student’s name writing sheet so you can use them in future lesson or for homework.
Get everyone to sit at a table with you. You are going to give clear instructions on getting ready for written work so everyone understands what to do in future lessons: first, tell everyone to get their bags (you do the same so they can see what to do). Then say, “Take out your crayons” – take out your crayons and have everyone follow you.
Take the sheets of paper and read the names – encourage each student to put their hand up and say, “Yes”. Give out the sheets to each student and give one to yourself.
Next, say, “Take out a crayon” and have the students follow you as you take out your crayon. Any [hide_on_uk]color[/hide_on_uk][hide_on_us]colour[/hide_on_us] will do. Model tracing your name, slowly and carefully, saying your name as you trace. Then have everyone trace the first name. Then put the crayon back into your pencil case and take out a different [hide_on_uk]color[/hide_on_uk][hide_on_us]colour[/hide_on_us]. Each time, use a different [hide_on_uk]color[/hide_on_uk][hide_on_us]colour[/hide_on_us]. As the students trace their names, circulate, help and give lots of praise. Finally, have everyone write their names on the bottom lines.
When everyone has finished, get each student to hold up their sheet so you and everyone can see. Give lots of praise to each student – you can even put stickers on each student’s sheet as a prize (they will love this) or even a simple drawing of a smiley face will do!
6. Do the “Name flower craft” activity
Now that everyone has had a chance to practice writing their name you can do the name craft activity.
Before class print out the “Name flower craft” sheet and copy / cut out the flower shapes so that there are enough to give one to each student (do a few extra in case of emergencies!).
Get each student to write their name on the line and then [hide_on_uk]color[/hide_on_uk][hide_on_us]colour[/hide_on_us] in their flower. Students can now decorate the classroom by sticking their name flowers on the walls. Alternatively, have students make a name poster by sticking all of the name flowers onto one large piece of construction paper (I like to make a tree shape out of brown card for students to stick their flowers on).
7. Introduce “5-minute play time”
This is an optional segment that can be part of all your lessons at this level. At this age, kids like a quick break and will be able to focus better on the rest of your lesson.
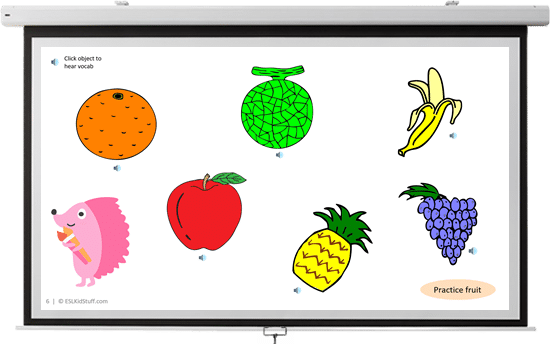
Allow your students to play with any games or toys you have. If possible, use large tubs or boxes to hold the toys and bring them out for a few minutes each lesson. Tubs filled with animals, plastic fruit, building blocks, kitchen sets, plastic food, cars & vehicles, Mr. Potato Head dolls and so on. Encourage your students to ask you for the toy they want to play with, circulate during the play time and ask students about their toys.
8. Teach [hide_on_uk]colors[/hide_on_uk][hide_on_us]colours[/hide_on_us]: red, blue, green
Over the next few lessons we’ll learn some [hide_on_uk]colors[/hide_on_uk][hide_on_us]colours[/hide_on_us]. In this lesson we’ll start with the [hide_on_uk]colors[/hide_on_uk][hide_on_us]colours[/hide_on_us] red, blue and green.
Origami paper is great for this, or just some [hide_on_uk]colored[/hide_on_uk][hide_on_us]coloured[/hide_on_us] paper/card cut into squares. Sit everyone in a circle and hold up the first [hide_on_uk]colored[/hide_on_uk][hide_on_us]coloured[/hide_on_us] paper and elicit the [hide_on_uk]color[/hide_on_uk][hide_on_us]colour[/hide_on_us] (e.g. red). Chorus and practice saying the [hide_on_uk]color[/hide_on_uk][hide_on_us]colour[/hide_on_us]. Do this for the rest of the [hide_on_uk]colors[/hide_on_uk][hide_on_us]colours[/hide_on_us].
9. Play “[hide_on_uk]Color[/hide_on_uk][hide_on_us]Colour[/hide_on_us] pass”, “[hide_on_uk]Color[/hide_on_uk][hide_on_us]Colour[/hide_on_us] touch” and “[hide_on_uk]Color[/hide_on_uk][hide_on_us]Colour[/hide_on_us] hold up”
Now take each [hide_on_uk]color[/hide_on_uk][hide_on_us]colour[/hide_on_us] and pass it to your nearest student. Say, “red” as you pass red, etc. The students pass the [hide_on_uk]colors[/hide_on_uk][hide_on_us]colours[/hide_on_us] round the circle. Next, lay the 3 [hide_on_uk]colors[/hide_on_uk][hide_on_us]colours[/hide_on_us] in the middle of the circle. Say, “Hands up”. Students raise their hands. Then say, “Touch…..red!” and the students should all try and touch the red [hide_on_uk]colored[/hide_on_uk][hide_on_us]coloured[/hide_on_us] paper. Do for all of the [hide_on_uk]colors[/hide_on_uk][hide_on_us]colours[/hide_on_us]. Finally, give each student one of the [hide_on_uk]colored[/hide_on_uk][hide_on_us]coloured[/hide_on_us] papers. Say, “Hold up….blue!” – the students holding the blue papers raise them into the air.
For these games you’ll probably have to give lots of help and encouragement. For example, if one of your students doesn’t hold up the [hide_on_uk]colored[/hide_on_uk][hide_on_us]coloured[/hide_on_us] paper when asked look at him/her and gesture what to do. If their mothers are with them in class, have them help out.
Wrap up:
1. Assign homework: “[hide_on_uk]Color[/hide_on_uk][hide_on_us]Colour[/hide_on_us] the balloons”
Hold up the homework worksheet and model [hide_on_uk]coloring[/hide_on_uk][hide_on_us]colouring[/hide_on_us] in the 3 balloon pictures (in red, blue and green). Elicit each [hide_on_uk]color[/hide_on_uk][hide_on_us]colour[/hide_on_us] as you go. Give out the worksheets and say, “Put your homework in your bags” and help them to do so – this is important as they will probably want to start [hide_on_uk]coloring[/hide_on_uk][hide_on_us]colouring[/hide_on_us] them right away.

2. Say goodbye to the glove puppet
Take out the bag again and get everyone to wake up the glove puppet by shouting its name into the bag (e.g. “Cookie Monster!”). Bring out the puppet and go through the same routine – go to each student and say hello, ask their name and the say goodbye / see you. Then put the puppet back in the bag (back to sleep).
3. Sing the “Goodbye song”
The “Goodbye song” is a great way to sign off the class. Sit together in a circle and sing and clap along.
Lyrics for the “Goodbye song”
Goodbye, goodbye,
See you again.
Goodbye, goodbye,
See you again.
It’s time to go,
It’s time to go,
It’s time to go,
See you next time.
Goodbye, goodbye,
See you again.
It’s time to go,
See you next time.
Gestures for the “Goodbye song”
These are quite straight forward. First time you play the song do the gestures and encourage everyone to do them with you.
- Wave as you sing the “Goodbye, goodbye” parts.
- Hold your hand above your eyes (as you would when you are looking into the distance and keeping the sun out of your eyes) and look at another student as you sing, “See you again”.
- Tap watch (or imaginary watch) and then point to the door as you sing, “It’s time to go”.
- Point towards another student as you sing, “See you next time”.
[hide_on_uk]Short sample (members get full-length song):
[/hide_on_uk]
[hide_on_us]Short sample (members get full-length song):
[/hide_on_us]
4. Do “Quick check” and say goodbye
Time to leave the class. Make sure everything is put away and the students have gathered their belongings. Have them line up at the door and place yourself between the door and the students. For each student check one new word (e.g. hold up a [hide_on_uk]color[/hide_on_uk][hide_on_us]colour[/hide_on_us] and ask, “What [hide_on_uk]color[/hide_on_uk][hide_on_us]colour[/hide_on_us] is this?”). For very young kids you can hold up the three [hide_on_uk]colored[/hide_on_uk][hide_on_us]coloured[/hide_on_us] papers you used earlier and have them touch one that you say (e.g. “Touch green”).
When they give you the correct answer say goodbye and let them leave. If their answer is wrong, have them go back to the end of the line – they will have to try again once they reach the front!
Other lesson plans
Levels:
Level 1 lessons (Age 3-5)
Level 2 lessons (Age 5-7)
Level 3 lessons (Age 7-9)
Level 4 lessons (Age 9-12)
Mini lessons (all ages)
Lessons in this level:
- Intro lesson
- [hide_on_uk]Colors[/hide_on_uk][hide_on_us]Colours[/hide_on_us] & fruit 1
- [hide_on_uk]Colors[/hide_on_uk][hide_on_us]Colours[/hide_on_us] & fruit 2
- [hide_on_uk]Colors[/hide_on_uk][hide_on_us]Colours[/hide_on_us] & fruit 3
- [hide_on_uk]Colors[/hide_on_uk][hide_on_us]Colours[/hide_on_us] & fruit 4
- Fruit and counting 1
- Fruit and counting 2
- Fruit and counting 3
- Review lesson: [hide_on_uk]colors[/hide_on_uk][hide_on_us]colours[/hide_on_us], fruit and counting
- Body and shapes 1
- Body and shapes 2
- Body and shapes 3
- Body and shapes 4
- Review lesson: Body, shapes and [hide_on_uk]colors[/hide_on_uk][hide_on_us]colours[/hide_on_us]
- Farm animals 1
- Farm animals 2
- Zoo animals 1
- Zoo animals 2
- Classroom objects and toys 1
- Classroom objects and toys 2
- Classroom objects and toys 3
- Review lesson: Animals, classroom objects, toys
- Our world 1
- Our world 2
- Weather 1
- Weather 2
- Clothes 1
- Clothes 2
- Vegetables and likes 1
- Vegetables and likes 2
- Vegetables and likes 3
- Review lesson: Our world, weather, clothes, vegetables
- Feelings and emotions 1
- Feelings and emotions 2
- Directions
- Wheels on the bus
- Review lesson: feelings, directions, wheels on the bus
Special lessons:
- Christmas lesson
- Halloween lesson
- Easter lesson
- Thanksgiving lesson