In the classroom 2 lesson plan
“What’s in your bag?”
Lesson 3 Level 3 Age 7-9
Lesson plans for ESL kids teachers
Lesson 3
In the classroom 2
This lesson plan continues with the theme of classroom stationery and also focuses on counting objects with numbers 1-10. Students do fun activities related to classroom stationery, complete a worksheet and read a fun story.
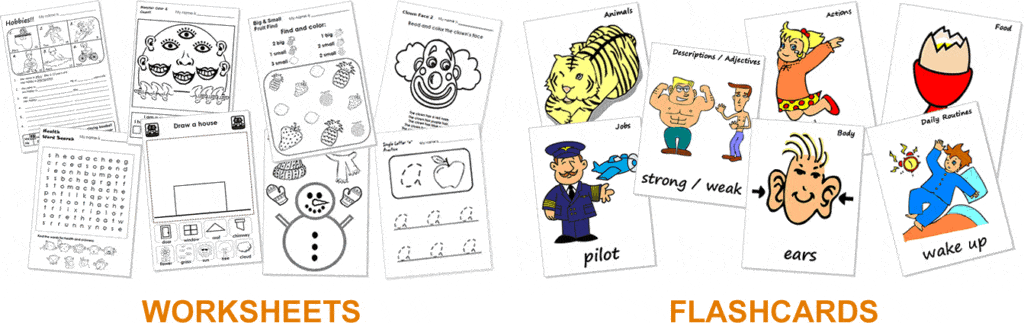
Members get accompanying worksheet, homework sheet, flashcards and reader.
Materials:
Our lesson plans are FREE!
Sign up for accompanying:
✔ worksheets
✔ homework sheets
✔ craft sheets
✔ flashcards
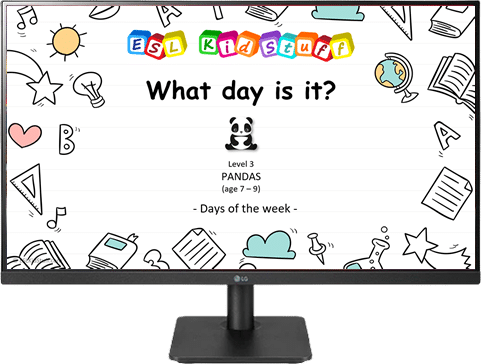
✔ PowerPoint lessons & multimedia
✔ song downloads & videos
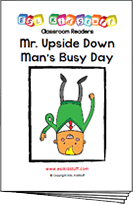
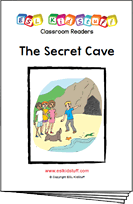
✔ classroom readers & videos
Click to see lesson details, materials and supplies
Age: 7-9 years
Time: 1 hour – 1 hour 20 mins
Objectives: Identify and say 5 different objects in the classroom, counting classroom objects.
Structures: What’s this?”, “Where is …?”, “How many … are there?”.
New vocabulary: table, chair, bookcase, door, window, numbers 1-10.
Review vocabulary: bag, pen, pencil, [hide_on_uk]eraser[/hide_on_uk][hide_on_us]rubber[/hide_on_us], crayon, ruler, stapler, glue, marker, scissors, book, paper, pencil sharpener, tape, pencil case, calculator.
Lesson materials
Flashcards:
- Classroom objects (table, chair, bookcase, door, window) – one set per student
Printables:
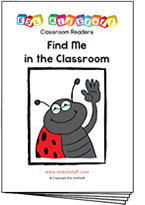
- Reader worksheet: Find me in the classroom
- Homework worksheet: Classroom objects count 1-10
Readers:
- Find me in the classroom
Supplies:
- name tags for each student
- a small ball
- Blu-Tack
- 10 sheets of origami [hide_on_uk]colored[/hide_on_uk][hide_on_us]coloured[/hide_on_us] paper (red, green, blue, yellow, purple, pink, orange, brown, black, white)
- classroom stationery: pen, pencil, [hide_on_uk]eraser[/hide_on_uk][hide_on_us]rubber[/hide_on_us], crayon, ruler, stapler, glue, marker, scissors, book, paper, pencil sharpener, tape, pencil case, calculator
- board with markers / chalk
In this lesson students learn words for classroom objects and practice counting to 10. There is also a fun story to read.
Lesson procedure:
Warm up and maintenance:
1. Greetings
Greet the students by name as they enter the classroom and gesture for them to sit down.
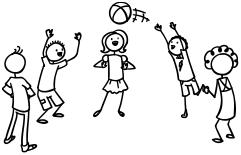
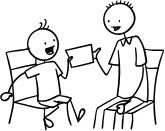
When everyone has arrived and is ready for class have everyone stand up. If there is room, have everyone form a circle. Take a ball and hold it and say, “My name is (you name)”. Then throw the ball to one student and say, “What’s your name?”.
Students throw the ball around randomly, saying their name each time they catch the ball and asking for the name of the next student as they throw it.

2. Name tags
Before class prepare some blank name tags (stickers or pin-on tags). Give these out and have everyone write their names and put their tags on. If you use pin-on tags, you can keep and give out every class.
For students who use a non-roman alphabet (e.g. Japanese), they should write they name in English letters – if they have never done this before you may have to help (possibly prepare their names on paper to copy).
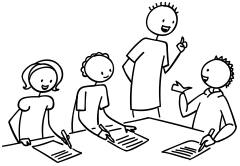
3. Homework check
Check each student’s homework that you set in the last lesson. Ask each student some questions about their homework worksheet (e.g. “What is this?, Is this a book?”), give lots of praise, and then put some kind of mark on the homework sheet (e.g. a sticker, a stamp or draw a smiley face).

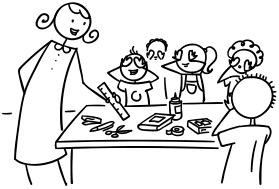
4. Review [hide_on_uk]colors[/hide_on_uk][hide_on_us]colours[/hide_on_us] and stationery
You will need 16 [hide_on_uk]colored[/hide_on_uk][hide_on_us]coloured[/hide_on_us] origami papers and the 16 stationery items from the last lesson. Put everyone in teams of 2 or 3 students. Hold up the first [hide_on_uk]colored[/hide_on_uk][hide_on_us]coloured[/hide_on_us] paper and ask what it is. The fist person to slap their desk can answer – a correct answer wins a point for the team. Then hold up a stationery item – again students race to slap their desk can answer and win a point. Then place the stationery item on top of the [hide_on_uk]colored[/hide_on_uk][hide_on_us]coloured[/hide_on_us] paper.
Continue with all of the 16 [hide_on_uk]colors[/hide_on_uk][hide_on_us]colours[/hide_on_us] and stationery items until you have all 16 [hide_on_uk]colored[/hide_on_uk][hide_on_us]coloured[/hide_on_us] papers and stationery items laid out in front of the class.
5. Play “What’s missing?”
At this point you will have 16 [hide_on_uk]colored[/hide_on_uk][hide_on_us]coloured[/hide_on_us] papers with different stationery items on top of each [hide_on_uk]color[/hide_on_uk][hide_on_us]colour[/hide_on_us]. We’ll now play a memory game – students will have to try to remember where the objects and [hide_on_uk]colors[/hide_on_uk][hide_on_us]colours[/hide_on_us] are. Allow the students a minute to memorize the positions and of items and [hide_on_uk]colors[/hide_on_uk][hide_on_us]colours[/hide_on_us] and then tell everyone to cover their eyes. Remove a [hide_on_uk]color[/hide_on_uk][hide_on_us]colour[/hide_on_us] and the item on top and hold it behind your back. Say, “Open your eyes!” – the first student who can shout out the missing [hide_on_uk]color[/hide_on_uk][hide_on_us]colour[/hide_on_us] and stationery item wins a point for his/her team. Play for all of the [hide_on_uk]colors[/hide_on_uk][hide_on_us]colours[/hide_on_us] / items.
Finally, calculate which team has won the most points and give them a round of applause.
New learning and practice:
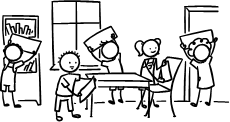
1. Introduce the classroom objects vocabulary
Today your students are going to learn the words: table, chair, bookcase, door, window. Before class, print off enough flashcard pictures of each of these items for each student in your class as well as yourself (so if you have 8 students you will need 9 table flashcards, 9 chair flashcards, etc.).
Start off by holding up the table flashcard. Proceed as follows:
Teacher: What’s this? It’s a table. Repeat “table”.
Students: “Table” (repeat 3 times)
Teacher: Can you see a table in the classroom? Point to the table.
Students: (Point to tables)
Teacher: Yes! Good job!
Lay the flashcard down. Then do the same for the other 4 flashcards.
Next give each student the same 5 flashcards and have them lay the cards out in front of them. Touch one of your cards (e.g. door) whilst saying the word and have your students touch and repeat on their cards. Go through all the cards.
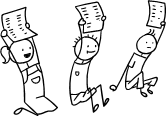
2. Play “Stick flashcards onto classroom objects”
Give each student a ball of Blu-Tack and demonstrate the activity: hold up the door flashcard, pull off a bit of Blu-Tack and stick it to the back of the card. Then walk over to a door in the classroom and stick the card to the door.
Say “door” as you do so.
Hold up the next flashcard and encourage students to point to the object (act as if you have no idea where it is) then walk over and stick the card to the object, again saying the name. Do this for all 5 flashcards.
Now your students can do the same thing. Teacher says an object (e.g. “table”) and all the students have to stick their flashcards onto the object, whilst saying the word.
3. Play “Fetch the flashcards from the classroom objects”
Now that all the flashcards are on objects in the classroom, we can bring them back – give instructions to individual students to go and get different flashcards and place it in front of them. Get everyone up and retrieving different cards at the same time, e.g.
Teacher: Miki, bring back the door card, please
(Miki stands up and goes to get the door card)
Teacher: Jose, bring back the bookcase flashcard, please
(Jose stands up and goes to get the bookcase card)
etc.
This should be fun and a little hectic. When everyone has collected the items and sat down with the flashcards in front of them the activity is over.
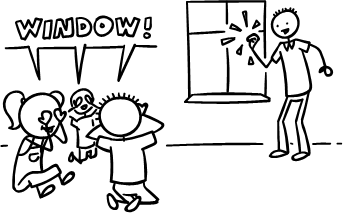
4. Play “Knock-knock”
Collect up the flashcards. Now tell everyone to close their eyes. Walk up to one of the objects (e.g. the window) and knock twice on it. Encourage the students to shout out what they think you are knocking on. Each time they can open their eyes to check.
Then pair up your students and get them to play “Knock-knock” together.
5. Play “Hide and find”
This is a really fun game. First demonstrate: take a small object (I always use a small koala toy) and tell everyone to close their eyes. Hide it in or near one of the classroom objects (e.g. under a table, behind a door, next to a window, in a bookcase, on a chair).
Tell everyone to open their eyes. Show that the koala is now gone and is hiding somewhere.
Ask for a volunteer to stand up and find the koala – if help is needed say it is hiding somewhere near one of the 5 classroom objects. When the student finds the koala give a big round of applause and elicit the classroom object the koala was hidden in or near.
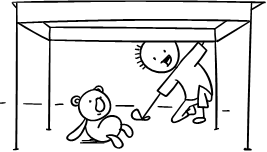
Now that everyone understands the game, pair up all the students and give each pair a small object to hide. Student A of each pair will hide the object while Student B closes their eyes. Let students change roles a few times.
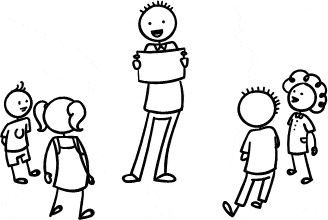
6. Read classroom reader “Find me in the classroom“
By this point your students will have had a good amount of practice identifying the key vocabulary so let’s have some fun with a story which incorporates the classroom vocabulary. Before class, download and print off the reader “Find me in the classroom”. As you go through each page, point to the key vocabulary in each picture and elicit the words. Then get your students to have fun searching for and finding the [hide_on_uk]ladybug[/hide_on_uk][hide_on_us]ladybird[/hide_on_us] hiding in the classroom, for example:
Teacher: (reading from page 1) “Hello, I’m Liana [hide_on_uk]Ladybug[/hide_on_uk][hide_on_us]Ladybird[/hide_on_us].” … Look, she’s in a classroom. What’s this (points at the door)?
Students: Door!
Teacher: Yes, that’s right. And what [hide_on_uk]color[/hide_on_uk][hide_on_us]colour[/hide_on_us] is it?
Students: Red!
Teacher: Yes, it’s red!
(teacher elicits the other classroom objects)
Teacher: (reading from page 1) “I’m going to hide” … Let’s look … (turns to page 2) … Where is Liana [hide_on_uk]Ladybug[/hide_on_uk][hide_on_us]Ladybird[/hide_on_us]?
Students: (pointing) Chair!
Teacher: Oh yes, there she is – under the chair! Repeat “Under the chair”.
Students: Under the chair.
etc.
Continue through the story, asking where the ladybug is hiding. Get the students really involved in the story by asking lots of questions (e.g. the [hide_on_uk]colors[/hide_on_uk][hide_on_us]colours[/hide_on_us] and where the other insects are) and even ask yes/no questions about where the [hide_on_uk]ladybug[/hide_on_uk][hide_on_us]ladybird[/hide_on_us] is hiding (making mistakes, of course), for example:
Teacher: (reading from page 4) “Where am I? Can you find me?” … Let’s see, is this Liana [hide_on_uk]Ladybug[/hide_on_uk][hide_on_us]Ladybird[/hide_on_us]? (points at the caterpillar).
Students: No!
Teacher: No? Well, is she here, on the table? (pointing at the beetle)
Students: No!
Teacher: Well, where is she?
Students: Bookcase! (pointing)
Teacher: (Looking more closely). Oh, yes! Well done! She’s on the bookcase! Repeat “On the bookcase”
etc.
After reading the story, give out a reader worksheet to each student and read through the story one more time (without stopping for questions, etc.) as students mark on their sheets the different places the ladybug hides. Then go through the answers as a class.
Alternatively, watch our video version of the reader (Internet connection required).
7. Read and write time
This segment can be part of all your lessons. Spend 10 to 15 minutes building up your students’ writing and reading skills. You’ll need to assess your students’ reading/writing level and then choose to start at one of the following stages:
1. Beginners: students cannot read or write the alphabet.
Each lesson introduce 3 lower-case letters of the alphabet (first lesson will be a, b, c). Use flashcards to do this. Play alphabet games and do printing worksheets.
» See our ‘Alphabet a-z (lowercase)’ mini-lesson plans for full details.
2. Early starters: students have experience with the alphabet but need phonics practice.
Each lesson introduce 5 lower-case letters of the alphabet (first lesson will be a, b, c, d, e). Use flashcards to do this. Start by working on the sounds of the letters and then move onto letter clusters (e.g. sh, ee, etc).
» See our ‘Alphabet’ and ‘Letter clusters’ mini-lesson plans for full details.
3. Early readers.
Work on reading and writing simple sentences with lots of practice activities.
» See our ‘Early reading’ mini-lesson plans for full details.
4. Elementary readers: students can read and write simple sentences well.
Work on reading and writing short texts and stories.
» See our ‘Reading short texts’ mini-lessons for full details.
8. Teach numbers 1-10 and play “Classroom objects touch”
Write the numbers 1-10, in order, across the top of the board. Point to each number and elicit/teach each one. Then chorus the numbers a few times, touching each number as you go.
Next, sit everyone in a circle. Start a slow hand clap, everyone clapping in time together. Start chanting the numbers as you clap, 1 to 10. Each round, speed up the clapping until everyone is clapping and chanting the numbers at a frantic pace.
Go back to the board, erase the numbers at the top and then write the numbers randomly around the board. Quickly point to different numbers and elicit them.
When everyone is comfortable with the numbers we can play the game: touching and counting classroom objects and stationery. Start by demonstrating: say, “Touch 7 tables” and walk around the classroom touching and counting 7 desks. Do the same for a couple more items (stationery as well – e.g. 4 pencils).
Now that everyone understands you can play the game – tell your class to touch different numbers of objects. Students should count as they go. Do a lot of rounds and keep it fast paced. It will be frantic but a lot of fun!
You can also put students in pairs to play this game.
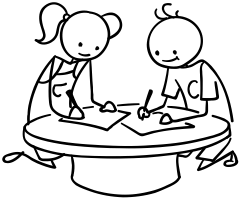
9. Do “Classroom objects count 1-10” worksheet
Hold up the worksheet and model counting and writing the numbers. Have your students take out their pens/pencils and complete their worksheets. Spend time with each student, helping, asking questions and praising.
Finally, have each student hold up their completed worksheet and ask them a question about it.
Tell your students to put their worksheets into their bags.
Wrap up:
1. Assign homework: “1 to 10 write“
Hold up the homework worksheet and model what to do. Then give out the worksheets and say, “Put your homework in your bags”.
2. Do “Quick check” and say goodbye
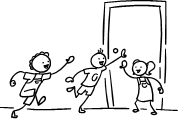
Time to leave the class. Make sure everything is put away and the students have gathered their belongings. Have them line up at the door and place yourself between the door and the students.
For each student check one new word by holding up a classroom object flashcard and asking, “What’s this?”. Then ask, “How many are there in this classroom?” – only choose items with 10 or less.
When they give you the correct answer say goodbye and let them leave. If their answer is wrong, have them go back to the end of the line – they will have to try again once they reach the front!
Other lesson plans
Levels:
Level 1 lessons (Age 3-5)
Level 2 lessons (Age 5-7)
Level 3 lessons (Age 7-9)
Level 4 lessons (Age 9-12)
Mini lessons (all ages)
Lessons in this level:
- Intro lesson
- In the classroom 1
- In the classroom 2
- Likes and dislikes 1
- Likes and dislikes 2
- Weather
- Clothes and weather 1
- Clothes and weather 2
- Days of the week
- Daily routines & time 1
- Daily routines & time 2
- Daily routines & time 3
- Daily routines & time 4
- Ability and family 1
- Ability and family 2
- Body and family 1
- Body and family 2
- Pets and possessions 1
- Pets and possessions 2
- Months and seasons 1
- Months and seasons 2
- Months and seasons 3
- Describing people 1
- Describing people 2
- Describing things 1
- Describing things 2
Special lessons:
- Christmas lesson
- Halloween lesson
- Easter lesson
- Thanksgiving lesson