In the classroom 1 lesson plan
“What’s in your bag?”
Lesson 2 Level 3 Age 7-9
Lesson plans for ESL kids teachers
Lesson 2
In the classroom 1
This lesson plan continues with the theme of classroom stationery from last lesson and also reviews [hide_on_uk]colors[/hide_on_uk][hide_on_us]colours[/hide_on_us]. Students do fun activities related to classroom stationery, read a funny story and do an active listening activity with a fun song.
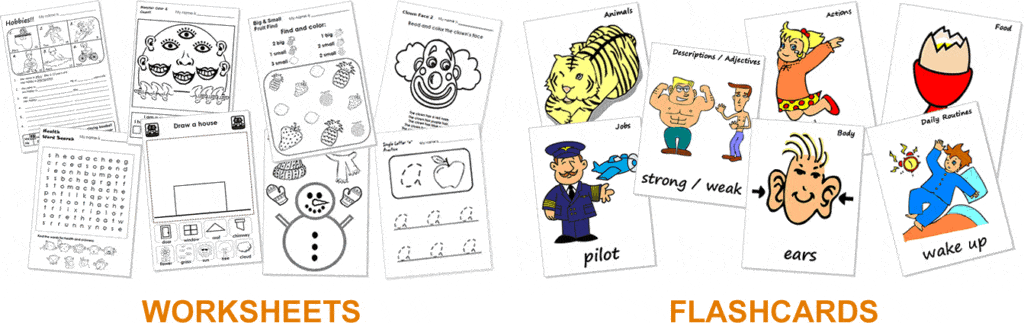
Members get accompanying worksheets, homework sheet, flashcards, song and reader.
Materials:
Our lesson plans are FREE!
Sign up for accompanying:
✔ worksheets
✔ homework sheets
✔ craft sheets
✔ flashcards
✔ PowerPoint lessons & multimedia
✔ song downloads & videos
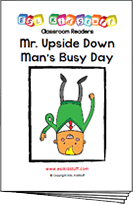
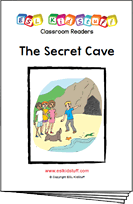
✔ classroom readers & videos
Click to see lesson details, materials and supplies
Age: 7-9 years
Time: 1 hour – 1 hour 20 mins
Objectives: Identify different classroom stationery, say [hide_on_uk]colors[/hide_on_uk][hide_on_us]colours[/hide_on_us] of things.
Structures: “What’s your name?”, “What’s in your bag?”, “Bring me the (pencil), please”, “Put it / them in my bag”, “Do you have my/a (pencil)?”.
New vocabulary: book, paper, pencil sharpener, tape, pencil case, calculator, computer.
Review vocabulary: bag, pen, pencil, [hide_on_uk]eraser[/hide_on_uk][hide_on_us]rubber[/hide_on_us], crayon, ruler, stapler, glue, marker, scissors, [hide_on_uk]colors[/hide_on_uk][hide_on_us]colours[/hide_on_us].
Lesson materials
Flashcards:
- Classroom stationery (pen, pencil, [hide_on_uk]eraser[/hide_on_uk][hide_on_us]rubber[/hide_on_us], crayon, ruler, stapler, glue, marker, scissors, book, paper, pencil sharpener, tape, pencil case, calculator)
- [hide_on_uk]Colorful[/hide_on_uk][hide_on_us]Colourful[/hide_on_us] stationery quiz flashcards
Printables:
- Reader worksheet: Jamie’s magic school bag
- Homework worksheet: What’s in your school bag or Classroom stationery crossword
Songs:
- What’s in your bag?
Readers:
- Jamie’s magic school bag
Supplies:
- name tags for each student
- a small ball
- 10 sheets of origami [hide_on_uk]colored[/hide_on_uk][hide_on_us]coloured[/hide_on_us] paper (red, green, blue, yellow, purple, pink, orange, brown, black, white)
- classroom stationery: pen, pencil, [hide_on_uk]eraser[/hide_on_uk][hide_on_us]rubber[/hide_on_us], crayon, ruler, stapler, glue, marker, scissors, book, paper, pencil sharpener, tape, pencil case, calculator
- board with markers / chalk
In this lesson students practice saying colors and build on their classroom stationery vocabulary. There is also a story to read and a fun song activity to do.
Lesson procedure:
Warm up and maintenance:
1. Greetings
Greet the students by name as they enter the classroom and gesture for them to sit down.
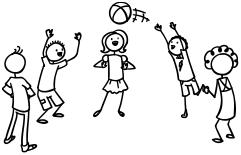
When everyone has arrived and is ready for class have everyone stand up. If there is room, have everyone form a circle. Take a ball and hold it and say, “My name is (you name)”. Then throw the ball to one student and say, “What’s your name?”.
Students throw the ball around randomly, saying their name each time they catch the ball and asking for the name of the next student as they throw it.

2. Name tags
Before class prepare some blank name tags (stickers or pin-on tags). Give these out and have everyone write their names and put their tags on. If you use pin-on tags, you can keep and give out every class.
For students who use a non-roman alphabet (e.g. Japanese), they should write they name in English letters – if they have never done this before you may have to help (possibly prepare their names on paper to copy).
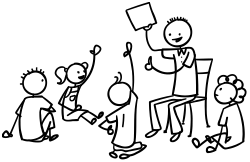
3. Homework check
Check each student’s homework that you set in the last lesson. Ask each student some questions about their homework worksheet (e.g. “What is this?, Is this a crayon?”), give lots of praise, and then put some kind of mark on the homework sheet (e.g. a sticker, a stamp or draw a smiley face).
4. Review [hide_on_uk]colors[/hide_on_uk][hide_on_us]colours[/hide_on_us]
Use [hide_on_uk]colored[/hide_on_uk][hide_on_us]coloured[/hide_on_us] origami paper / paper / card for this – you’ll need all 10 [hide_on_uk]colors[/hide_on_uk][hide_on_us]colours[/hide_on_us] (red, yellow, pink, green, purple, orange, blue, brown, black, white). Sit everyone in a circle and hold up the first [hide_on_uk]colored[/hide_on_uk][hide_on_us]coloured[/hide_on_us] paper and elicit the [hide_on_uk]color[/hide_on_uk][hide_on_us]colour[/hide_on_us] (e.g. red). Chorus and practice saying the [hide_on_uk]color[/hide_on_uk][hide_on_us]colour[/hide_on_us]. Do this for the rest of the [hide_on_uk]colors[/hide_on_uk][hide_on_us]colours[/hide_on_us].
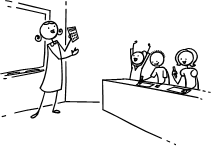
5. Play “[hide_on_uk]Color[/hide_on_uk][hide_on_us]Colour[/hide_on_us] pass”, “[hide_on_uk]Color[/hide_on_uk][hide_on_us]Colour[/hide_on_us] touch” and “[hide_on_uk]Color[/hide_on_uk][hide_on_us]Colour[/hide_on_us] hold up”
Now take each [hide_on_uk]color[/hide_on_uk][hide_on_us]colour[/hide_on_us] and pass it to your nearest student. Say, “red” as you pass red, etc. The students pass the [hide_on_uk]colors[/hide_on_uk][hide_on_us]colours[/hide_on_us] round the circle. Next, lay the 10 [hide_on_uk]colors[/hide_on_uk][hide_on_us]colours[/hide_on_us] in the middle of the circle. Say, “Hands up”. Students raise their hands. Then say “Touch…..red!” and the students should all try and touch the red [hide_on_uk]colored[/hide_on_uk][hide_on_us]coloured[/hide_on_us] paper. Do for all of the [hide_on_uk]colors[/hide_on_uk][hide_on_us]colours[/hide_on_us].
Finally, give each student one of the [hide_on_uk]colored[/hide_on_uk][hide_on_us]coloured[/hide_on_us] papers. Say, “Hold up….blue!” – the students holding the blue papers raise them into the air.
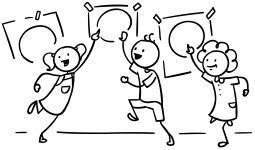
6. Play “Touch the [hide_on_uk]colors[/hide_on_uk][hide_on_us]colours[/hide_on_us] on the walls”
This is a great activity to do, especially if your classroom has lots of [hide_on_uk]colorful[/hide_on_uk][hide_on_us]colourful[/hide_on_us] posters on the walls. If not, before class pin lots of [hide_on_uk]colored[/hide_on_uk][hide_on_us]coloured[/hide_on_us] paper around the classroom walls (at touching height).
Demonstrate by shouting out a [hide_on_uk]color[/hide_on_uk][hide_on_us]colour[/hide_on_us] (e.g. “Red”). Run and touch red on any poster / red origami. Do the same for another [hide_on_uk]color[/hide_on_uk][hide_on_us]colour[/hide_on_us] (e.g. “Blue”). Each time run to a new poster/paper. Now have the students do the activity – shout out a [hide_on_uk]color[/hide_on_uk][hide_on_us]colour[/hide_on_us] and have them all run around the classroom touching the [hide_on_uk]colors[/hide_on_uk][hide_on_us]colours[/hide_on_us] on the walls.
7. Do the “[hide_on_uk]Colorful[/hide_on_uk][hide_on_us]Colourful[/hide_on_us] stationery” quiz
Let’s review the stationery form the last lesson along with the [hide_on_uk]colors[/hide_on_uk][hide_on_us]colours[/hide_on_us]. Before class, print out the “[hide_on_uk]Colorful[/hide_on_uk][hide_on_us]Colourful[/hide_on_us] stationery quiz flashcards”. Mix them up and then show the first one – students should shout out the [hide_on_uk]color[/hide_on_uk][hide_on_us]colour[/hide_on_us] and the item as quickly as they can. Do for all 10 flashcards. Also, teach the plural “s” sound where necessary (e.g. yellow pencils”).
New learning and practice:
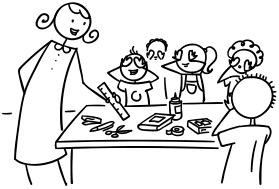
1. Review / Introduce stationery vocabulary
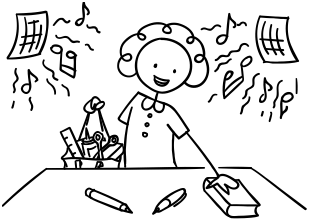
We’ll continue with classroom stationery. Bring out the bag of stationery from the last lesson. Before class put in the following items: pen, pencil, [hide_on_uk]eraser[/hide_on_uk][hide_on_us]rubber[/hide_on_us], crayon, ruler, stapler, glue, marker, scissors, book, paper, pencil sharpener, tape, pencil case, calculator.
First, hold up the bag and elicit and chorus the word “bag”. Then take out the first item from the bag (e.g. a pencil) and elicit / teach and chorus the word. Place that object on the table. Do the same for all the objects, each time placing them in a line on the table.
When all the items are on the table, point to each in turn and elicit the item.
2. Play “What’s missing?”
Tell everyone to close and cover their eyes. Take away an item from the table and hide it behind your back. Then say, “Open your eyes”.
Point to the missing space on the table and encourage everyone to shout out the missing item. Keep playing until you have practiced every word.
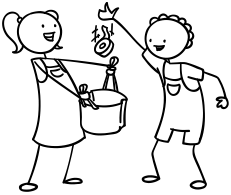
3. Play “Bring me the item”
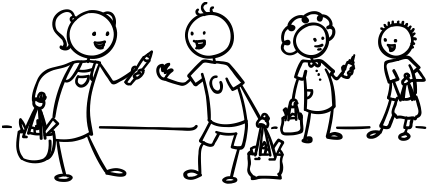
Pick up all the items from the table and place them around the room. Then select a student and say “Bring me the (scissors)” – that student will have to stand up, locate the object and bring it to you (dropping into your bag). Do this for all the objects, each time selecting a different student. For a fun challenge, you can have everyone close and cover their eyes as you put the objects around the room.
Next, put students in pairs. Each pair should have one bag of the stationery objects between them (if you don’t have enough for everyone you can use flashcards in a bag instead). One of the students should place different items around the room and then ask his/her partner to collect each item and place into his/her bag using the structures:
“Bring me the (tape), please.”
“Put it into my bag.”
“Thank you.“
When the bag is full, the students can change roles.
4. Read classroom reader “Jamie’s magic school bag”
This classroom reader ties in perfectly with the lesson vocab and objectives. Before class, download and print off the reader “Jamie’s Magic School Bag” from our website as well as the reader worksheet.
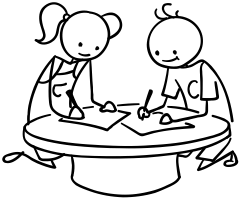
First, give out the reader worksheets and have everyone do the first exercise.
Next, bring everyone over so you can read the story. As you go through each page, point to the items Jamie pulls out of his school and elicit what they are and have everyone mark them on their worksheets (exercise 2). Practice using the lesson structures:
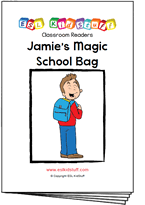
Teacher: “What’s in your bag, Jamie?” (reading from page 2). What do you think he has in his bag?
Students: pencils, crayons? (etc. – guessing)
Teacher: Ok, let’s see… (turning to page 3) … Oh look! What are these?
Students: Pencils and pens!
Teacher: Yes, that’s right! (reading from page 3) “I have pencils and pens”. What else do you think he has in his school bag?
Get the students really involved in the story by asking lots of questions (e.g. eliciting the objects and their colors) and getting everyone to guess what items he will pull out next.
Alternatively, watch our video version of the reader (Internet connection required).
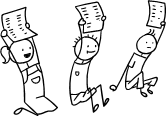
5. Play the “What’s in your bag?” song
For this song, make sure everyone has a bag full of the items from the song (if you don’t have enough for everyone you can use flashcards in a bag instead). Explain that they have to listen carefully and take out each item in the order of the items in the song – and place them in a line, in the correct order, on their desk. Play the song and then check the order of everyone’s items after the song has finished (you can use the song poster for this). You may want to do this activity 2 or even three times until everyone can get the order right.
Lyrics for the “What’s in your bag?” song
Chorus:
What’s in your bag?
What’s in your bag?
What is in your bag?
Verse 1:
Do you have a pencil?
Do you have a pen?
Do you have a book?
Do you have glue?
Chorus
Verse 2:
Do you have crayons?
Do you have a ruler?
Do you have an eraser?
Do you have scissors?
Chorus
Verse 3:
Do you have a pencil case?
Do you have a stapler?
Do you have a pencil sharpener?
Do you have tape?
Chorus
Gestures for the “What’s in your bag?” song
There is a great activity to go with this song.
- before class, prepare enough bags of stationery (with all the objects in the song) so that each student has a bag (if you don’t have enough for everyone you can use flashcards in a bag instead). It may be easier if you tell your students (or their parents) what to bring in the preceding class – though have plenty of spares for students who forget. For the bags, simple supermarket bags are fine.
- play the song and have students listen and take out each item of stationery as it is sung and place the items on their desk in the correct order (you can check by using the song poster). This can be quite challenging, but good fun! You may want to play the song two or three times to give everyone a chance of getting the correct order.
[hide_on_uk]Short sample (members get full-length song):
[/hide_on_uk]
[hide_on_us]Short sample (members get full-length song):
[/hide_on_us]
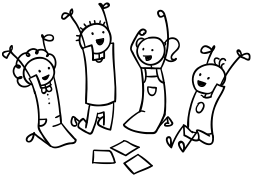
6. Play “Stationery swap”
By the end of the song activity, everyone will have their stationery objects (or flashcards) in front of them, on their desks. We are going to mix them all up amongst the students and then everyone will have to find their objects again!
Start by saying to one student, “Collect the (pencils) and give everybody a different pencil”. Do the same for all of the objects (using different student to distribute them), so by the end everyone has a bag full of stationery which isn’t theirs.
Everybody now has to find their own stationery. Get everyone to stand up and mingle, using the structure:
- “Do you have my (pencil)?”
As everyone mingles they have to swap their objects (each student cannot have two or more of any one item) and continue until their bag is full of their own items.
7. Read and write time
This segment can be part of all your lessons. Spend 10 to 15 minutes building up your students’ writing and reading skills. You’ll need to assess your students’ reading/writing level and then choose to start at one of the following stages:
1. Beginners: students cannot read or write the alphabet.
Each lesson introduce 3 lower-case letters of the alphabet (first lesson will be a, b, c). Use flashcards to do this. Play alphabet games and do printing worksheets.
» See our ‘Alphabet a-z (lowercase)’ mini-lesson plans for full details.
2. Early starters: students have experience with the alphabet but need phonics practice.
Each lesson introduce 5 lower-case letters of the alphabet (first lesson will be a, b, c, d, e). Use flashcards to do this. Start by working on the sounds of the letters and then move onto letter clusters (e.g. sh, ee, etc).
» See our ‘Alphabet’ and ‘Letter clusters’ mini-lesson plans for full details.
3. Early readers.
Work on reading and writing simple sentences with lots of practice activities.
» See our ‘Early reading’ mini-lesson plans for full details.
4. Elementary readers: students can read and write simple sentences well.
Work on reading and writing short texts and stories.
» See our ‘Reading short texts’ mini-lessons for full details.
Wrap up:
1. Assign homework: “What’s in your school bag” or “Classroom stationery crossword”
Choose a homework worksheet to fit your students’ level: if they cannot read or write well, select the “What’s in your school bag?” worksheet. For students who can read / write simple words, choose the crossword.
The crossword worksheet download contains an answer sheet.
Hold up the homework worksheet and model what to do. Then give out the worksheets and say, “Put your homework in your bags”.
2. Do “Quick check” and say goodbye
Time to leave the class. Make sure everything is put away and the students have gathered their belongings. Have them line up at the door and place yourself between the door and the students. For each student check one new word by holding up a stationery item or flashcard and ask, “What’s this?”.
When they give you the correct answer say goodbye and let them leave. If their answer is wrong, have them go back to the end of the line – they will have to try again once they reach the front!
Other lesson plans
Levels:
Level 1 lessons (Age 3-5)
Level 2 lessons (Age 5-7)
Level 3 lessons (Age 7-9)
Level 4 lessons (Age 9-12)
Mini lessons (all ages)
Lessons in this level:
- Intro lesson
- In the classroom 1
- In the classroom 2
- Likes and dislikes 1
- Likes and dislikes 2
- Weather
- Clothes and weather 1
- Clothes and weather 2
- Days of the week
- Daily routines & time 1
- Daily routines & time 2
- Daily routines & time 3
- Daily routines & time 4
- Ability and family 1
- Ability and family 2
- Body and family 1
- Body and family 2
- Pets and possessions 1
- Pets and possessions 2
- Months and seasons 1
- Months and seasons 2
- Months and seasons 3
- Describing people 1
- Describing people 2
- Describing things 1
- Describing things 2
Special lessons:
- Christmas lesson
- Halloween lesson
- Easter lesson
- Thanksgiving lesson