Intro lesson (ages 7-9)
“Hello”
Lesson 1 Level 3 Age 7-9
Lesson plans for ESL kids teachers

Lesson 1
Intro lesson (ages 7-9)
This lesson plan will help you get your ESL kids course off to a great start with fun ‘getting to know each other’ activities, making a collaborative classroom rules poster and playing games for learning classroom stationery vocabulary.
Members get accompanying worksheets and homework sheet.
Materials:
Our lesson plans are FREE!
Sign up for accompanying:
✔ worksheets
✔ homework sheets
✔ craft sheets
✔ flashcards
✔ PowerPoint lessons & multimedia
✔ song downloads & videos
✔ classroom readers & videos
Click to see lesson details, materials and supplies
Age: 7-9 years
Time: 1 hour – 1 hour 20 mins
Objectives: Greetings, ask & answer personal questions, use modal verbs for rules, identify different classroom stationery.
Structures: “What’s your name?”, “My name is…”, ” Where are you from?”, “What pet [hide_on_uk]do you have[/hide_on_uk][hide_on_us]have you got[/hide_on_us]?”, “What is your [hide_on_uk]favorite[/hide_on_uk][hide_on_us]favourite[/hide_on_us] food/drink/[hide_on_uk]color[/hide_on_uk][hide_on_us]colour[/hide_on_us]?”
Target vocabulary: pet, food, drink, [hide_on_uk]color[/hide_on_uk][hide_on_us]colour[/hide_on_us], brother, sister, can, can’t, must, mustn’t, bag, pen, pencil, [hide_on_uk]eraser[/hide_on_uk][hide_on_us]rubber[/hide_on_us], crayon, ruler, stapler, glue, marker, scissors.
Lesson materials
Printables:
- Class survey intros worksheet
- Ask me – Ideas sheet
- Homework worksheet: Classroom objects
Supplies:
- name tags for each student
- a small ball
- poster paper (one sheet per group of 4-6)
- [hide_on_uk]colored[/hide_on_uk][hide_on_us]coloured[/hide_on_us] markers
- classroom stationery: pen, pencil, [hide_on_uk]eraser[/hide_on_uk][hide_on_us]rubber[/hide_on_us], crayon, ruler, stapler, glue, marker, scissors
- board with markers / chalk
This lesson provides a good platform to begin the course with your 7-9 year olds as it provides an opportunity for everyone to get to know each other and also sets the ground rules for [hide_on_uk]behavior[/hide_on_uk][hide_on_us]behaviour[/hide_on_us] within the classroom. ‘Wh’ question forms, modal verbs for rules and stationery vocabulary will also be practiced.
Lesson procedure:
Warm up and maintenance:
1. Greetings
Greet the students by name as they enter the classroom and gesture for them to sit down.
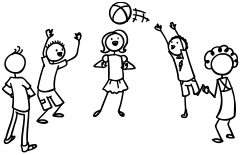
When everyone has sat down and is ready say, “My name is …” and give your name. Then tell everyone to stand up. If there is room, have everyone form a circle. Take a ball and hold it and say your name. Then throw the ball to one student and they say their name. Students throw the ball around randomly, saying their name each time they catch the ball.
Then, play the same throwing game, but instead of saying your name, say the name of the person who threw the ball to you – start by asking one student to throw the ball to you and as you catch it say their name. Then throw to another student and they should say your name as they catch it. If anyone gets a name wrong (or can’t remember) they have to sit down for 3 throws. By the end of the activity everyone should have a good idea of everyone else’s names!
2. Name tags
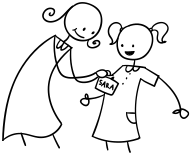
Before class prepare some blank name tags (stickers or pin-on tags). Give these out and have everyone write their names and put their tags on. If you use pin-on tags, you can keep and give out every class.
For students who use a non-roman alphabet (e.g. Japanese), they should write they name in English letters – if they have never done this before you may have to help (possibly prepare their names on paper to copy).
New learning and practice:
1. Do the “Ask me” activity
On the board draw a little stick man / woman and write your name under it.
Then write some answers to the following questions (just the answers) around the board:
- Age: How old are you?
- Hometown: Where are you from?
- Pets: What pet do you have?
- Food: What is your [hide_on_uk]favorite[/hide_on_uk][hide_on_us]favourite[/hide_on_us] food?
- Drink: What is your [hide_on_uk]favorite[/hide_on_uk][hide_on_us]favourite[/hide_on_us] drink?
- [hide_on_uk]Color[/hide_on_uk][hide_on_us]Colour[/hide_on_us]: What is your [hide_on_uk]favorite[/hide_on_uk][hide_on_us]favourite[/hide_on_us] [hide_on_uk]color[/hide_on_uk][hide_on_us]colour[/hide_on_us]?
- Brothers / Sisters: How many brothers and sisters [hide_on_uk]do you have[/hide_on_uk][hide_on_us]have you got[/hide_on_us]?
For example:
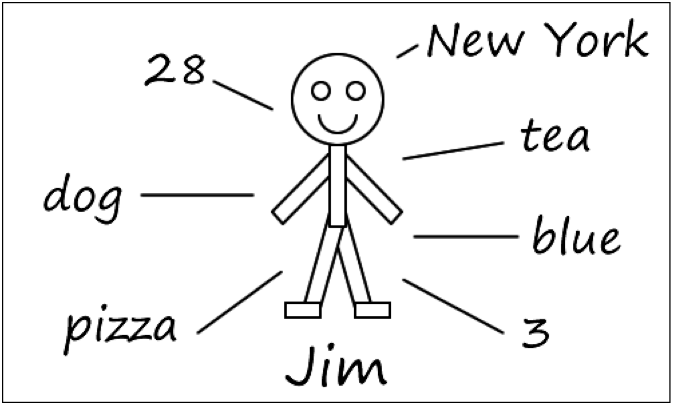
The idea is to try and have your students guess what the answers relate to and the what the question is for each answer. Start by writing on the board:
- Name: What is your name?
Then point to your name on the board. Chorus the question x3.
Next, point to your hometown on the board and try to elicit the question “Where are you from?”. As you elicit and help, write the questions on the board until all the questions are there. Again, chorus the questions x3.
2. Write about yourself
Have your students draw a stick man / woman on a piece of paper with their name underneath and write down their answers to the questions on the board – basically doing the same thing as you did on the board. Students can use the ideas on the “Ask me – Ideas” sheet (print out before the lesson).
As students are writing their answers, circulate and help with mistakes, pronunciation and vocabulary.
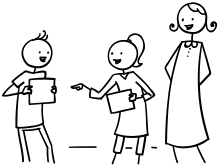
3. Practice asking and answering questions
Put students in pairs and have them practice asking and answering the questions from their stick person sheets.
As they do this circulate and monitor, helping out with mistakes and pronunciation – and always give lots of praise.
4. Do a class survey
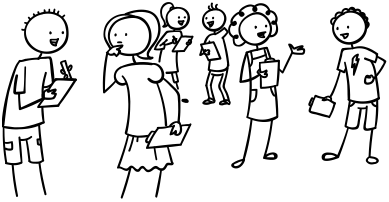
Give out the survey sheets to each student. Go through the column headers and make sure everyone understands that they have to ask questions to 8 other students to complete their survey. If you have less than 9 students in your class, each student will need to interview everyone in the class. Just to make sure, model the activity with a student, asking the questions and showing writing the answers. Then allow everyone to get up and mix around as they complete their surveys.
5. Create a classroom rules poster
Setting rules and boundaries is extremely important in your kids lessons – kids can feel comfortable knowing what is and isn’t accepted and having this clearly stated at the beginning of the course will really help with classroom management. This part of the lesson can be enjoyable and is a good way to practice modals “can”, “can’t”, “must”, “mustn’t”.
Firstly, prepare your board as shown below:
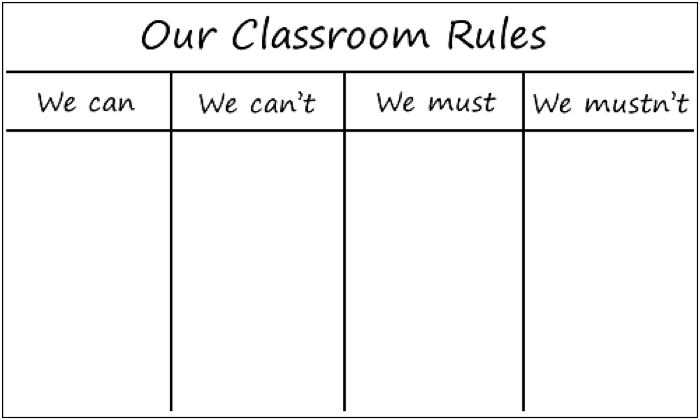
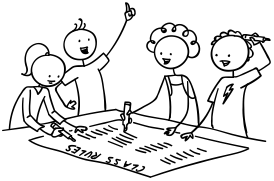
Next, put your students into groups of 4-6 students. Give each group a large sheet of paper and [hide_on_uk]colored[/hide_on_uk][hide_on_us]coloured[/hide_on_us] marker pens to create their rules poster. Have them copy what you have on your board. Then explain that they must write down as many ideas as they can on their rules poster – they can even include some strange rules if they wish!
If your student’s level is too low to write sentences, they can draw their ideas instead.
Some ideas:
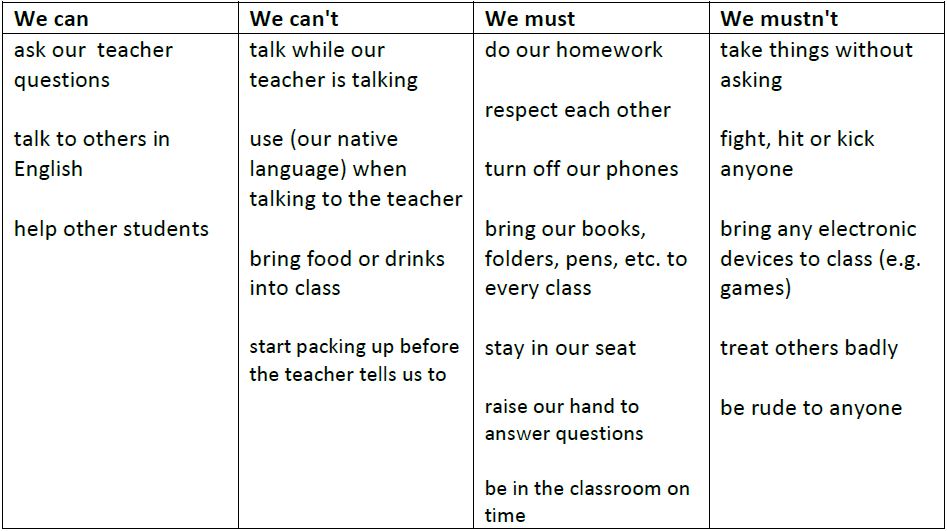
As the groups are making their posters, circulate and help with grammar, vocab, spelling. Also, make sure the rules you want are on each poster. Allow students to use different colors and draw pictures – the posters should be attractive and fun.
When the posters are finished, get everyone in the group to sign it. This helps to reinforce the rules as a kind of classroom “contract”- if any rules are broken in future lessons you can point to the rule which the offending student has signed.
Finally, get your students to pin their posters to the wall. Groups can then present their rules poster to the class – this should bring up some good discussion as well as the use of modals.
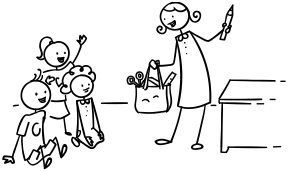
6. Play “Classroom stationery quiz”
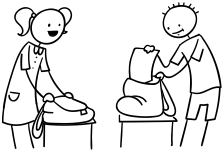
We’ll finish the lesson with a fun activity based around the vocab of classroom stationery. Before class, prepare a bag of the following items of classroom stationery: pen, pencil, [hide_on_uk]eraser[/hide_on_uk][hide_on_us]rubber[/hide_on_us], crayon, ruler, stapler, glue, marker, scissors.
Put students into teams (of 3-6) and tell them that you are going to show them some objects that they must write down on a piece of paper. Points will be given for each correct answer as follows:
- perfect answers (correct word and spelling): 3 points
- nearly perfect answers (correct word but incorrect spelling): 2 points
- slightly correct (e.g. “sisor” instead of “scissors”): 1 point
Explain that the winning team will win a prize (prepare some stickers or [hide_on_uk]candy[/hide_on_uk][hide_on_us]sweets[/hide_on_us])!
Take out each object and teams work together to write down the answers – some they will probably know and some not.
At the end, get each team to swap papers and go through the answers as teams mark the answer sheets. Present the prize to the winning team. Include the bag you were keeping the items in as well.
7. Play “What’s missing?”
Line up all of the stationery so that everyone can see. Tell everyone to close their eyes – then remove one item. Say “Open your eyes” and everyone must shout out the missing item. Do this for all of the items.
Wrap up:
1. Assign homework: “Classroom objects” worksheet
Hold up the homework worksheet and model unscrambling the letters and matching the pictures to the words.
2. Do “Quick check” and say goodbye
Time to leave the class. Make sure everything is put away and the students have gathered their belongings. Have them line up at the door and place yourself between the door and the students. For each student check one new word (e.g. hold up a stationery item and ask, “What’s this?”).
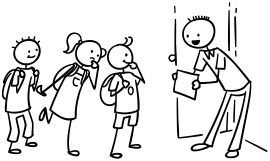
When they give you the correct answer say goodbye and let them leave. If their answer is wrong, have them go back to the end of the line – they will have to try again once they reach the front!
Other lesson plans
Levels:
Level 1 lessons (Age 3-5)
Level 2 lessons (Age 5-7)
Level 3 lessons (Age 7-9)
Level 4 lessons (Age 9-12)
Mini lessons (all ages)
Lessons in this level:
- Intro lesson
- In the classroom 1
- In the classroom 2
- Likes and dislikes 1
- Likes and dislikes 2
- Weather
- Clothes and weather 1
- Clothes and weather 2
- Days of the week
- Daily routines & time 1
- Daily routines & time 2
- Daily routines & time 3
- Daily routines & time 4
- Ability and family 1
- Ability and family 2
- Body and family 1
- Body and family 2
- Pets and possessions 1
- Pets and possessions 2
- Months and seasons 1
- Months and seasons 2
- Months and seasons 3
- Describing people 1
- Describing people 2
- Describing things 1
- Describing things 2
Special lessons:
- Christmas lesson
- Halloween lesson
- Easter lesson
- Thanksgiving lesson


