Comparing things (Comparative adjectives) lesson plan
Stand-alone lesson ESL kids lesson plan
Lesson plans for ESL kids teachers
Comparing things (Comparative adjectives)
In this lesson, students practice using common adjectives to describe objects and then make comparisons using comparative adjectives. They play comparison games and complete a comparisons worksheet.
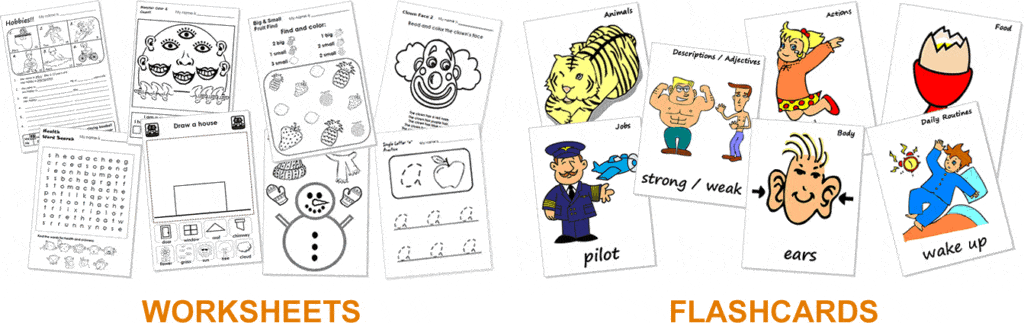
Members get accompanying worksheets and classroom reader.
Download materials:
Our lesson plans are FREE!
Sign up for accompanying:
✔ worksheets
✔ homework sheets
✔ craft sheets
✔ flashcards
✔ song downloads & videos
✔ classroom readers & videos
Click to see lesson details, materials and supplies
Time: 40 mins – 1 hour
Objectives: Comparing objects using comparative adjectives.
Structures: “This is smaller” (adj + er), “That is more beautiful” (more + adj).
Target vocabulary: tall/taller, short/shorter, long/longer, fast/faster, slow/slower, heavy/heavier, big/bigger, small/smaller, new/newer, old/older, cheap/cheaper, beautiful, [hide_on_uk]colorful[/hide_on_uk][hide_on_us]colourful[/hide_on_us], delicious, expensive, good/better, bad/worse.
Lesson materials
Printables:
- Adjectives & comparatives pictures worksheet
- Compare things at home worksheet
- Adjective word cards
- Reader worksheet
Readers:
- Ben the wizard
Additional materials:
- Comparatives vocab crossword
- Comparatives vocab word search
- Comparing things (comparative adjectives) worksheet
Supplies:
- [hide_on_uk]colored[/hide_on_uk][hide_on_us]coloured[/hide_on_us] pencils
- people pictures (e.g. from magazines): for tall / short adjectives
- pencils (long and short ones)
- car pictures (from magazines): for fast / slow adjectives
- heavy animal pictures / toys (e.g. elephant, hippo, rhino, cow, whale, etc.)
- plastic food or flashcards which has different sized items: for big / small / delicious adjectives
- some old / new looking objects (e.g. books, clothes)
- some cheap / expensive looking objects
- some butterfly or tropical bird pictures: for [hide_on_uk]colorful[/hide_on_uk][hide_on_us]colourful[/hide_on_us] and beautiful adjectives
- some weather pictures: for good / bad
- blue tak or tape to stick the pictures to your board
- lots of magazines or other print materials (such as [hide_on_uk]catalogs[/hide_on_uk][hide_on_us]catalogues[/hide_on_us], brochures, newspapers, books with pictures, etc.)
- board with marker / chalk
This lesson will help your students describe the world around them and make comparisons. This lesson should be taught after the Describing things (adjectives) lesson as much of that lessons vocab will be recycled.
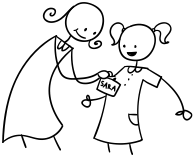
A comparative adjective compares differences between two nouns. For example, “The blue car is faster than the red car”.
Comparatives take the following forms:
- the adj+er: in most cases, adjectives with 1 or 2 syllables take the “er” form (e.g. fast – faster / heavy – heavier)
- the more + adj: in most cases, adjectives with 3 or more syllables take the “more ~” form (e.g. expensive – more expensive / beautiful – more beautiful)
- there are a few exceptions to the above rule (e.g. modern – more modern)
- irregular forms: “good” and “bad” take the irregular forms “better” / “worse”
Lesson procedure:
Warm up and maintenance:
The beginning of your lesson is extremely important: this is where you set the tone of your lesson and get everyone in the right frame of mind for learning English. It is also an opportunity to check homework and review previous lessons.
Click for warm up suggestions for the start of your lessons
These activities can be done in the following order at the start of your lesson:
1. Greetings and name tags
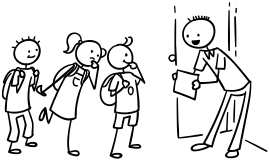
Greet the students by name as they enter the classroom and gesture for them to sit down. Before class prepare some blank name tags (stickers or pin-on tags). Give these out and have everyone write their names and put their tags on. If you use pin-on tags, you can keep and give out every class.
2. Homework check
Check each student’s homework set in the last lesson. Ask each student some questions about their homework worksheet (e.g. “what [hide_on_uk]color[/hide_on_uk][hide_on_us]colour[/hide_on_us] is it?”), give lots of praise, and then put some kind of mark on the homework sheet (e.g. a sticker, a stamp or draw a smiley face). Finally, tell your students to put their homework back into their bags.
3. Review past lessons
Reviewing past lessons is very important – students need constant practice of new vocab, structures, songs, games and so on. Always review parts of your last lesson as well as some parts from other previous lessons. You can spend 5-10 minutes reviewing – it’s fine to recycle games and activities from your past lessons to review as kids enjoy playing familiar games (although be careful not to play a game to death!). See the section “Other ideas to include in your warm” below for ideas.
You can also include review activities in the main body of your lesson. Kids can have short attention spans so it’s good to be able to pull out lots of activities during different stages of the lesson.
Other ideas to include in your warm up:
Ball pass questions
This is good to review questions from previous lessons. Get everybody standing in a circle.
Round 1:
Take a ball and hold it and say, “My name is (you name)”. Then throw the ball to one student and say, “What’s your name?”. Students throw the ball around randomly, saying their names and asking for names.
Round 2:
This time ask a review question, e.g. “How many tables are there?”. Then throw the ball to a student who should answer, “There are (6) tables”. Help if necessary. Then that student throws the ball to another student and asks a “How many …?” question. Continue so everyone has a go. You can have multiple rounds with different topic questions.

Play “Spin the bottle”
Sit students in a circle with a bottle in the middle. Teacher spins the bottle. When it stops spinning the student it is pointing to has to answer a question. If the answer is correct then that student can spin the bottle. This is a good class warm up activity (e.g. How are you? What’s your [hide_on_uk]favorite[/hide_on_uk][hide_on_us]favourite[/hide_on_us] food? How’s the weather today?, etc.
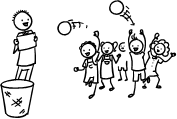
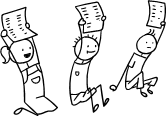
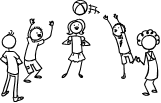
Play “Vocabulary basketball”
This is a fun game which reviews vocabulary from previous lessons. You will need a basket (a trash can) and 2 balls (or 2 pieces of A4 paper scrunched up into balls).
Form 2 teams and line them up so that two players from each team are facing the front with the basket in front of them. Let both players throw their ball – if they get their ball into the basket they can try and win a point by giving the correct answer to a question the teacher asks. This can be an actual question (e.g. What are you wearing?) or a flashcard (What’s this?). Then they go to the back of the line. At the end, the team with the most points is the winner!
Play “What’s missing?”
This is a fun review memory game – students will have to try to remember review objects from previous lessons (e.g. classroom stationery). Lay the objects out on a table for all to see. Allow the students a minute to memorize the positions of the objects. Remove an object and hold it behind your back. Say, “Open your eyes!” – the first student who can shout out the missing object wins a point for his/her team. Play for all the objects.
Finally, calculate which team has won the most points and give them a round of applause.

Play “Quiz game show”
This is a fun quiz game, like a simple version of a TV game show. Draw some circles on the board and randomly write numbers 1, 2 or 3 in each circle. These will be points.
Put students into teams. Then ask the first team to choose a number – 1 is an easy question (e.g. “Do you like bananas?”) and 3 is a difficult question (e.g. point at a clock and ask, “What time is it?”). 2 will be in between in terms of difficulty. When the question has been answered correctly, erase that number circle. Play until all the number circles are gone – the team with the most points is the winner!
Read a classroom reader again
As you progress through the lessons you will start to build up a catalog of classroom readers (see our Readers download page at https://www.eslkidstuff.com). Kids love going back to old stories and reading through them again. Invite a student to pick a classroom reader and read through it as a class. Make the story as interactive as possible by asking questions (e.g. what [hide_on_uk]colors[/hide_on_uk][hide_on_us]colours[/hide_on_us] there are, the names of different objects, etc.) and getting students to speculate what is going to happen next in the story.
Talk about the weather (do after you have taught the weather lesson plan).
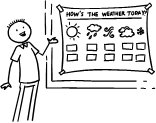
- Prepare a weather board. Before the first class prepare a piece of cardboard and cover it with felt – you are going to pin this to the wall. If you can, try and get blue felt (to represent the sky). Write at the top in large letters, “How’s the weather today?”. Below that write “Today it’s”. Cut out weather pictures (such as our weather flashcards) and stick some velcro on the back. Arrange the weather pictures around the edge of the board and then put the board on the wall of your classroom. You can now use this weather board at the beginning of every lesson.
- Ask about the weather. Ask, “How’s the weather today?” and have students put up their hands. Allow one weather condition per student (e.g. “It’s rainy”) and have each student come up and put a weather picture on the weather board.
- Introduce more weather vocabulary. Depending on weather conditions, you can introduce more weather words (with pictures … you can get students to draw them), such as:
- stormy
- misty
- showery
- freezing
- humid
- frosty
- icy
- drizzly
New learning and practice:
1. Review and teach adjectives
Before class:
Before the lesson collect at least two of each of the following objects, pictures or flashcards:
- people pictures (e.g. from magazines): for tall / short adjectives
- pencils (long and short ones)
- car pictures (from magazines): for fast / slow adjectives
- heavy animal pictures / toys (e.g. elephant, hippo, rhino, cow, whale, etc.)
- plastic food or flashcards which has different sized items: for big / small / delicious adjectives
- some old / new looking objects (e.g. books, clothes)
- some cheap / expensive looking objects (e.g. pens, watches)
- some butterfly or tropical bird pictures: for [hide_on_uk]colorful[/hide_on_uk][hide_on_us]colourful[/hide_on_us] and beautiful adjectives
- some weather pictures: for good / bad
Also, cut out the word cards – one set for each pair or group (and a set for yourself) – see last page of our printable lesson plan for word cards.
During class:
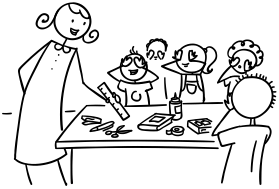
Scatter the objects / photos / flashcards randomly around the classroom (e.g. under tables, stuck to walls, on bookshelves, etc.). Students are going to match word cards to the objects around the room (see last page of the PDF lesson plan for word cards).
Put students into pairs or small groups. Give each group a set of word cards. Tell the students they must find an object or picture that represents each word card and then place that word card next to the object or picture. Also explain that if the students don’t know any of the words on the cards, they must guess which object to place it on.
Set a time limit (e.g. 5 minutes) and have the pairs / groups work together to place the cards next to the objects.
Allow and encourage students to place the word cards on other objects in the classroom, such as their bags (e.g. for heavy, old, [hide_on_uk]colorful[/hide_on_uk][hide_on_us]colourful[/hide_on_us], etc.).
Once the time is up, get all the students to sit down in their groups. Ask different students to bring up the objects with their word cards and place them prominently at the front of the class (e.g. on a table). For each object, give a point to the team with the correct word card (e.g. a long pencil with the word card “long”). If there are any objects without a correct word card, teach the word for that object.
The team with the most points at the end is the winner.
2. Draw adjective pictures on the “Adjectives & comparatives pictures” worksheet
Give out the “Adjectives & comparatives pictures” worksheet to each student. Students continue to work in their same teams. Have students, using the objects and word cards at the front of the class for reference, draw pictures next to the words in the “adjectives” column (e.g. draw a tall man next to “tall” and a short man next to “short”).
When everyone has finished, chorus all of the adjectives on the worksheet. Then have pairs work together: one points to pictures on the worksheet and their partner says the adjective, for example:
Student A: What’s this?
Student B: A fast car.
Student A: And this?
Student B: A tall man.
etc.
Make sure students keep the worksheets as they will be using them again later in the lesson.
3. Teach comparative adjectives (adj+er / more + adj)
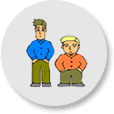
Take two of the people pictures that you used in the first activity. Stick them to the board. Under the shorter of the two, write “short”. Point to the second person and teach/elicit “tall – taller” and write that under the picture, underlining the “er” part (taller).
Do this for a couple more ~er adjectives (e.g. short – shorter; long – longer; etc.).
Next, place two “expensive” object pictures on the board. Write “expensive” under one and then ask what should be written under the other. You will probably get the answer “expensiver” – here teach the other and write form (more expensive).
Then, do another more + adj on the board.
4. Write and draw comparatives on the “Adjectives & comparatives pictures” worksheet
Have the students take out their “Adjectives & comparatives pictures” worksheets again. Get them to have a go at writing all the comparative adjectives and draw pictures in the comparatives column.
For example, first point out the “taller” man and word in the first row, then model writing “smaller” and drawing a smaller man in the second row, comparative column.
As students are working on their worksheets circulate and help out. When everyone has finished, go through the worksheet by eliciting and writing the answers on the board. Make sure you focus on the following:
- spelling of heavier (“y changes” to “i”)
- spelling of bigger (add a second “g”)
- irregular form of good (better) and bad (worse)
5. Students test each other on comparatives
Place students in pairs. Student A looks at his/her worksheet and Student B turns over his/hers. A starts by giving a short sentence with the adjective and B says the comparative form, for example:
Student A: An old book.
Student B: An older book.
Student A: A beautiful bird.
Student B: A more beautiful bird.
Pairs change roles after completing the test.
Finally, have all students turn over their worksheets and stand up. Say an adjective to each student and ask them to change your adjective example into a comparative. They can sit down if they give the correct answer. For example:
Teacher: David, a cheap car.
David: A cheaper car.
Teacher: Good job! You can sit down.
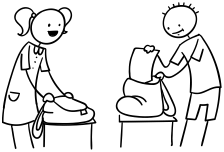
6. Play “Let’s compare things around us”
Put students into pairs. Start by modeling the activity with a student. Walk around the class and point to something – say a short sentence using an adjective from the worksheet, such as “A cheap pencil case”. Your partner then needs to find another pencil case in the class which s/he can compare it to, for example:
Teacher: (pointing) A cheap pencil case.
Student (pointing) A cheaper pencil case.
(or)
Student (pointing) A more expensive pencil case.
Then have pairs walk around the room making comparisons.
7. Read classroom reader “Ben the wizard”
This reader helps to reinforce the vocab and structures practiced in the previous activities. Before class, download and print off the reader “Ben the wizard”. As you go through each page, point to the different spells Ben the wizard is doing and elicit the adjectives and comparatives, for example:
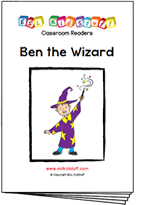
Teacher: (pointing at the top picture on page 2) What is this boy doing?
Students: He’s running!
Teacher: Yes, that’s right. Why is he running?
Students: To catch the bus!
Teacher: Yes, but why? Is he early or late?
Students: Late!
Teacher: Yes, he must be late. Do you think he can catch the bus?
Students: No!
Teacher: Why not?
Students: The bus is too fast!
Teacher: Right! So if the bus is too fast, the boy must be … ?
Students: Too slow!
Teacher: Yes, good job! Now look here (pointing to the picture of Ben). He’s casting another spell – zap! Now, is the boy too slow?
Students: No, he’s faster!
Teacher: That’s right, good job! Let’s check (reading) “John is late for his bus to school! He’s not fast enough to catch it. Zap! Now he’s much faster!”
Continue through the story, eliciting the key vocab and structures. You can also try asking students to predict what spell Ben is going to cast by coving the second picture on each page with your hand.
After reading the story, give out a reader worksheet to each student and have everyone complete the sentences. Then go through the answers as a class.
Alternatively, watch our video version of the reader (Internet connection required).
8. Play the “Magazine pictures comparisons game”
For this activity you’ll need to prepare lots of magazines or other print materials (such as [hide_on_uk]catalogs[/hide_on_uk][hide_on_us]catalogues[/hide_on_us], brochures, newspapers, books with pictures, etc.).
Start by writing all of the adjectives from today’s lesson randomly on the white board, as follows:

Next, put students into groups of 3 or 4 and have each group sit around a table. Place a pile of magazines and other print materials in the middle of the table (as many as you can).
Elect a student to start the game in each group (Student A). Student A should flick through any of the magazines on the table and find a picture. They should then use one of the adjectives from the board to describe the picture, such as “A beautiful boat”. On this cue, the rest of the students in the group need to search through the remaining magazines on the table to find a picture of the same object and say a comparative sentence (e.g. “A more beautiful boat”).
- the first student to find a comparative and make a correct sentence wins a point.
- if no one can find a comparative picture the student who started the round wins a point.
- the student who wins the point starts the next round.
- at the end, the student with the most points is the winner.
As the games are being played, circulate and help out with vocab and mistakes. Let the games continue until at least everyone has had a couple of goes at choosing a picture.
Finally, do a class check: ask at least one student from each team to show you a comparison they made.
Wrap up:
Assign homework: “Compare things at home” worksheet
Click for wrap up suggestions for the end of your lessons
1. Assign homework
Each week give out a homework worksheet for your students to take home. Hold up the homework worksheet and model how to do it. Give out the worksheets and say, “Put your homework in your bags”.
2. Do “Quick check”
Time to leave the class. Make sure everything is put away and the students have gathered their belongings. Have them line up at the door and place yourself between the door and the students. For each student check one new word or phrase, for example:
- hold up an object or flashcard (such as an item of clothing) and ask, “What’s this?”
- ask a question from the lesson (e.g. “Where do you live?”, “Do you like bananas?”, “Can you play chess?”, etc.)
When they give you the correct answer say goodbye and let them leave. If their answer is wrong, have them go back to the end of the line – they will have to try again once they reach the front!
Other lesson plans
Actions, verbs & tenses:
- Can – for ability
- Morning routines
- Daily routines & times of the day
- Actions – Present continuous
- Future plans using “going to”
- Past tense activities – Regular verbs
- Past tense activities – Irregular verbs: Part 1
- Past tense activities – Irregular verbs: Part 2
Adjectives:
- Describing people
- Describing things
- Comparing things (Comparative adjectives)
- Comparing things (Superlative adjectives)
Adverbs:
Alphabet:
Animals:
Body:
Classroom:
Clothes:
Colors:
Colours:
Directions:
Family:
Feelings & emotions:
Food:
Health & sickness:
Holidays & festivals:
Jobs:
Likes, dislikes & favorites:
Likes, dislikes & favourites:
- Likes & dislikes
- [hide_on_uk]Favorites[/hide_on_uk][hide_on_us]Favourites[/hide_on_us] and asking why
Nature & Our world:
Numbers:
Places & where we live:
Prepositions of location:
Pronouns:
Shapes:
Shopping:
Sports:
Time, days, months, seasons:
Toys:
Transport & travel:
Weather: