[hide_on_uk]Colors[/hide_on_uk][hide_on_us]Colours[/hide_on_us] lesson plan
Stand-alone lesson ESL kids lesson plan
Lesson plans for ESL kids teachers
[hide_on_uk]Colors[/hide_on_uk][hide_on_us]Colours[/hide_on_us]
In this lesson students practice recognizing and saying 7 [hide_on_uk]colors[/hide_on_uk][hide_on_us]colours[/hide_on_us]. Students play lots of action-packed games, sing The rainbow song, read a fun story about [hide_on_uk]colors[/hide_on_uk][hide_on_us]colours[/hide_on_us] and do a [hide_on_uk]coloring[/hide_on_uk][hide_on_us]colouring[/hide_on_us] activity worksheet.
Members get accompanying flashcards, worksheets, song and classroom reader.
Download materials:
Our lesson plans are FREE!
Sign up for accompanying:
✔ worksheets
✔ homework sheets
✔ craft sheets
✔ flashcards
✔ song downloads & videos
✔ classroom readers & videos
Click to see lesson details, materials and supplies
Time: 40 mins – 1 hour
Objectives: Saying [hide_on_uk]colors[/hide_on_uk][hide_on_us]colours[/hide_on_us].
Structures: “What [hide_on_uk]color[/hide_on_uk][hide_on_us]colour[/hide_on_us] is it?”
Target vocabulary: red, yellow, pink, green, purple, orange, blue, rainbow, apples, sun, flowers, grass, grapes, carrots, sky.
Lesson materials
Printables:
- [hide_on_uk]Colors[/hide_on_uk][hide_on_us]Colours[/hide_on_us] of the rainbow worksheet
- Cup cake [hide_on_uk]color[/hide_on_uk][hide_on_us]colour[/hide_on_us]! worksheet
- Wall circle sheet
- Reader worksheet
- The rainbow song song poster
Songs:
- The rainbow song
Readers:
- What [hide_on_uk]color[/hide_on_uk][hide_on_us]colour[/hide_on_us] am I?
Additional materials:
- Colors vocab crossword
- Colors vocab word search
- Colors of the crayons worksheet
Supplies:
- [hide_on_uk]colored[/hide_on_uk][hide_on_us]coloured[/hide_on_us] crayons / pencils
- [hide_on_uk]colored[/hide_on_uk][hide_on_us]coloured[/hide_on_us] paper (e.g. origami paper) for all the [hide_on_uk]color[/hide_on_uk][hide_on_us]colour[/hide_on_us] vocab (enough for each student to have a set of [hide_on_uk]colors[/hide_on_uk][hide_on_us]colours[/hide_on_us])
- cushions (1 per student)
- device to play the song on
This is a nice, easy fun lesson – parts of it can be reused in later lessons as your students continue to learn the [hide_on_uk]color[/hide_on_uk][hide_on_us]colour[/hide_on_us] words.
Lesson procedure:
Warm up and maintenance:
The beginning of your lesson is extremely important: this is where you set the tone of your lesson and get everyone in the right frame of mind for learning English. It is also an opportunity to check homework and review previous lessons.
Click for warm up suggestions for the start of your lessons
These activities can be done in the following order at the start of your lesson:
1. Welcoming
Greet the students by name as they enter the classroom and gesture for them to sit down. If you have space on the floor, it’s a good idea to have a cushion for each student as this makes sitting arrangements easy to [hide_on_uk]organize[/hide_on_uk][hide_on_us]organise[/hide_on_us]. Try and arrange the cushions beforehand spaced out in a fan-shape around you.
2. Name tags
Before class prepare some name tags (stickers or pin-on tags) with each student’s name written in lower case letters. Sit down with your students and lay out the name tags in front of you. Pick up each tag and call out the name. Try and encourage each student to put their hand up and say “yes”. Hand over the tags and help to pin / stick on. Later on as your students recognize their written names you can have each student in turn pick out their own name tag.
3. Greetings
Use a glove puppet (such as a Sesame Street puppet) to greet the students. Keep him in a cloth bag. Bring out the bag, open it enough to see in and shout into the bag the puppet’s name (e.g. “Cookie Monster!”). Then move your ear to the opening to listen – nothing. Go to each student and encourage them to shout the puppet’s name into the bag – each time nothing happens. Finally, get all the students together to shout the name at the same time. This time the puppet wakes up and jumps out of the bag! The puppet then chats to each student:
Puppet (teacher): Hello, What’s your name?
Student Hello. My name is….
Puppet: Goodbye / See you!
Student: Goodbye / See you!
As your students learn more phrases, you can include them in the conversation, such as “How old are you? Do you like …?, Can you …?, etc.
Finally, the puppet goes back into the bag and back to sleep.
4. Sing the “Hello song” or a review song
Sit in a circle and sing along to the song. Encourage students to clap along or pat their laps in time with the music. The Hello song is a good song to start the lesson with, especially as it has an accompanying Goodbye song to sing at the end of the lesson.
Lyrics for the “Hello song”
Hello, hello, Hello, hello,
How are you? How are you?
I’m fine, thank you, I’m fine, thank you,
We’re ok, We’re ok.
Lyrics for “The Hello Song”
Hello, hello,
How are you today?
Hello, hello,
How are you today?
I’m fine, thank you,
I’m fine, thank you,
I’m fine, thank you,
And how about you?
Hello, hello,
How are you today?
I’m fine, thank you,
And how about you?
Gestures for the “Hello song”
These are quite straight forward. First time you play the song do the gestures and encourage everyone to do them with you.
- Wave as you sing the “Hello, hello” parts.
- Gesture to others as you sing, “How are you today?”
- Point to yourself as you sing, “I’m fine, thank you”
- Hand gesture towards another student as you sing, “And how about you?”.
[hide_on_uk]Short sample (members get full-length song):
[/hide_on_uk]
[hide_on_us]Short sample (members get full-length song):
[/hide_on_us]
5. Read a classroom reader again
As you progress through the lessons you will start to build up a catalog of classroom readers. Kids love going back to old stories and reading through them again. Invite a student to pick a classroom reader and read through it as a class. Make the story as interactive as possible by asking questions (e.g. what [hide_on_uk]colors[/hide_on_uk][hide_on_us]colours[/hide_on_us] there are, the names of different objects, etc.) and getting students to speculate what is going to happen next in the story.
6. Homework check
Check each student’s homework set in the last lesson. Ask each student some questions about their homework worksheet (e.g. “what [hide_on_uk]color[/hide_on_uk][hide_on_us]colour[/hide_on_us] is it?”), give lots of praise, and then put some kind of mark on the homework sheet (e.g. a sticker, a stamp or draw a smiley face). Finally, tell your students to put their homework back into their bags.
7. Do “Exercise routine” activity
Say the following and have your students follow your lead: “Stand up (teacher stands and so does everyone else), “Hands up / hands down” (x 3-5), “Jump” (x3-5), “Run! / Stop!” (x3-5), “Turn around! / Stop!” (x3-5), finally “Sit down”.
Throughout the course you can introduce other commands, such as “Hop”, “Star Jump”, “Wiggle”, “Crouch” and so on.
Extra activity: Once your students have got to know these exercises you can play “Teacher says” using these actions.
This is basically the game ‘Simon says’ but using the words “Teacher says” instead. The teacher tells the students to do an action and they do as asked (e.g. “Teacher says … jump 3 times”). The teacher keeps on giving instructions with different actions using “Teacher says …”. At some point the teacher gives a command without using the phrase “Teacher says” (e.g. “Hop 5 times”) and the students must not do that action – they have to stay still. Any students that do the action have to sit out for the rest of the game. The last student standing is the winner.
8. Name writing practice
If your students cannot write their names yet, this is a great activity. For really young ones, don’t worry if their effort is a scrawly mess – always encourage and praise.
You will need to prepare a writing sheet for each student before class with their name written in dots for them to practice tracing their names (also prepare one for yourself so you can model the task). You can either make these yourself (hand draw the dots for each name) or use a font typed into a Word document – we like to use the “National First Font Dotted” font (you can download it for free here: http://www.fontspace.com/roger-white/national-first-font-dotted).
Prepare the sheets something like this:
Make a few extra copies of each student’s name writing sheet so you can use them in future lesson or for homework.
When everyone has finished writing their names, get each student to hold up their sheet so you and everyone can see. Give lots of praise to each student.
9. Review past lessons
Reviewing past lessons is very important – students need constant practice of new vocab, structures, songs, games and so on. Always review parts of your last lesson as well as some parts from other previous lessons. You can spend 5-10 minutes reviewing – it’s fine to recycle games and activities from your past lessons to review as kids enjoy playing familiar games (although be careful not to play a game to death!).
Note: You can also include review activities in the main body of your lesson. Kids can have short attention spans so it’s good to be able to pull out lots of activities during different stages of the lesson.
Other ideas to include in your warm up:
What’s in the bag?
This is a great activity to do at the beginning of your lessons. Fill a large cloth bag with items from your previous lessons (e.g. plastic fruit, animals, etc.). You can also throw in a few other objects (e.g. a pencil, a plastic bottle, a plastic cup – anything lying around (and safe!)). Show the bag to your students and shake it to rattle the objects inside. Pull out different objects, teach/elicit their names, have students hold and pass the objects around. You can even have students pull objects out of the bag. Pull out 1 or 2 objects per student. Finally, place the objects around the classroom and have each student retrieve each object as you call out its name and put it back in the bag.
Knock-knock
This can be used at the beginning of each class. Teach the students to knock on the door before entering the classroom. There are 2 variations for the next step:
- When the student knocks, teacher says, “Who’s there?”. The student replies, “It’s (Koji)” and then the teacher says, “Come in (Koji)”.
- When the student knocks the teacher must guess who it is, “Is that (Koji)?”. The student replies yes or no – if no, the teacher continues guessing. Having your students develop their own knocking styles makes this even more fun.

Spin the bottle
Sit students in a circle with a bottle in the middle. Teacher spins the bottle. When it stops spinning the student it is pointing at has to answer a question. If the answer is correct then that student can spin the bottle. For example, How are you? What’s your name? What is this? (show an object or flashcard) Do you like _?, etc.
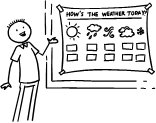
Talk about the weather (do after you have taught the weather lesson plan).
- Prepare a weather board. Before the first class prepare a piece of cardboard and cover it with felt – you are going to pin this to the wall. If you can, try and get blue felt (to represent the sky). Write at the top in large letters, “How’s the weather today?”. Below the write “Today it’s”. Cut out weather pictures (such as our weather flashcards) and stick some velcro on the back. Arrange the weather pictures around the edge of the board and then put the board on the wall of your classroom. You can now use this weather board at the beginning of every lesson.
- Sing “The weather song”. Sing the song together doing all of the gestures.
- Look outside. Get everyone to look outside by saying, “How’s the weather? Look outside”. Elicit the weather for that day.
- Put the weather pictures on the weather board. Invite some students to come up and put the weather pictures on the board. Make sure these students say the word as they put the card on the board.
New learning and practice:
1. Teach the [hide_on_uk]colors[/hide_on_uk][hide_on_us]colours[/hide_on_us] vocabulary
Depending on the age / level of your students you may want to teach a just few words per class, building up to the full 7 [hide_on_uk]color[/hide_on_uk][hide_on_us]colour[/hide_on_us] words over a series of lessons. For older students you may also want to teach the objects in the song (apples, sun, flowers, grass, grapes, carrots, rainbow, sky). Prepare [hide_on_uk]colored[/hide_on_uk][hide_on_us]coloured[/hide_on_us] paper (origami paper is great for this) – enough [hide_on_uk]colors[/hide_on_uk][hide_on_us]colours[/hide_on_us] for each student in your class (so, 1 red per student, 1 yellow per student, etc.).
Hold up the first [hide_on_uk]colored[/hide_on_uk][hide_on_us]coloured[/hide_on_us] paper and elicit the [hide_on_uk]color[/hide_on_uk][hide_on_us]colour[/hide_on_us] (e.g. red). Chorus and practice saying the [hide_on_uk]color[/hide_on_uk][hide_on_us]colour[/hide_on_us]. Then pass the [hide_on_uk]colored[/hide_on_uk][hide_on_us]coloured[/hide_on_us] paper around the class so each student can hold and say the [hide_on_uk]color[/hide_on_uk][hide_on_us]colour[/hide_on_us]. Do this for the rest of the [hide_on_uk]colors[/hide_on_uk][hide_on_us]colours[/hide_on_us].

2. Play “[hide_on_uk]color[/hide_on_uk][hide_on_us]colour[/hide_on_us] stand up and jump”
Give out all of the [hide_on_uk]colored[/hide_on_uk][hide_on_us]coloured[/hide_on_us] papers, 1 [hide_on_uk]color[/hide_on_uk][hide_on_us]colour[/hide_on_us] per student. Tell your students to sit down. Say a [hide_on_uk]color[/hide_on_uk][hide_on_us]colour[/hide_on_us] (e.g. “red”) and the students holding that [hide_on_uk]color[/hide_on_uk][hide_on_us]colour[/hide_on_us] have to quickly stand up, jump and then sit down. Start off slowly and get faster and faster.
3. Play “Touch the [hide_on_uk]colors[/hide_on_uk][hide_on_us]colours[/hide_on_us] on posters”
If your classroom has lots of [hide_on_uk]colorful[/hide_on_uk][hide_on_us]colourful[/hide_on_us] posters on the walls, this is a great activity to do. Demonstrate by shouting out a [hide_on_uk]color[/hide_on_uk][hide_on_us]colour[/hide_on_us] (e.g. “Red”). Run to a poster and touch anywhere that has a red [hide_on_uk]color[/hide_on_uk][hide_on_us]colour[/hide_on_us]. Do the same for another [hide_on_uk]color[/hide_on_uk][hide_on_us]colour[/hide_on_us] (e.g. “Blue”). Each time run to a new poster. Now have the students do the activity – shout out a [hide_on_uk]color[/hide_on_uk][hide_on_us]colour[/hide_on_us] and have them all run around the classroom touching the [hide_on_uk]colors[/hide_on_uk][hide_on_us]colours[/hide_on_us] on posters.
4. Do “[hide_on_uk]Color[/hide_on_uk][hide_on_us]Colour[/hide_on_us] the circles” activity
Before class, prepare 7 large sheets of white paper (or if you are teaching less [hide_on_uk]colors[/hide_on_uk][hide_on_us]colours[/hide_on_us] that day, enough sheets of paper for the [hide_on_uk]colors[/hide_on_uk][hide_on_us]colours[/hide_on_us] you are teaching). On each sheet draw a large circle which fills up the sheet (or download and print our wall circle sheet). Then stick the sheets on the walls of the classroom, at a height your students can reach. At this point of your lesson, take out your [hide_on_uk]colored[/hide_on_uk][hide_on_us]coloured[/hide_on_us] pencils/crayons and demonstrate the activity. Walk around the class and [hide_on_uk]color[/hide_on_uk][hide_on_us]colour[/hide_on_us] a small part of each circle with one [hide_on_uk]color[/hide_on_uk][hide_on_us]colour[/hide_on_us] (always say the [hide_on_uk]color[/hide_on_uk][hide_on_us]colour[/hide_on_us] as you are [hide_on_uk]coloring[/hide_on_uk][hide_on_us]colouring[/hide_on_us]). So there will be one circle with some red [hide_on_uk]color[/hide_on_uk][hide_on_us]colour[/hide_on_us] in it, one with yellow, and so on. Next, tell your students to take out their [hide_on_uk]colored[/hide_on_uk][hide_on_us]coloured[/hide_on_us] pencils/crayons. Have them walk around the classroom, [hide_on_uk]coloring[/hide_on_uk][hide_on_us]colouring[/hide_on_us] in a bit of each circle with the same [hide_on_uk]colors[/hide_on_uk][hide_on_us]colours[/hide_on_us] you used. Make sure they say the [hide_on_uk]color[/hide_on_uk][hide_on_us]colour[/hide_on_us] as they do each [hide_on_uk]coloring[/hide_on_uk][hide_on_us]colouring[/hide_on_us].
5. Play “Point at the [hide_on_uk]colored[/hide_on_uk][hide_on_us]coloured[/hide_on_us] circles”
Have all of your students sit down. Call out a [hide_on_uk]color[/hide_on_uk][hide_on_us]colour[/hide_on_us] and demonstrate by pointing at the [hide_on_uk]colored[/hide_on_uk][hide_on_us]coloured[/hide_on_us] circle on the wall. Do all of the [hide_on_uk]colors[/hide_on_uk][hide_on_us]colours[/hide_on_us] in the order of the song, with the students pointing at the different [hide_on_uk]colored[/hide_on_uk][hide_on_us]coloured[/hide_on_us] circles.

6. Sing “The rainbow song”
The first time you play the song, put up the Rainbow Song song poster on the board. Quickly elicit the [hide_on_uk]colors[/hide_on_uk][hide_on_us]colours[/hide_on_us]. Play the song and sing along, touching the [hide_on_uk]colors[/hide_on_uk][hide_on_us]colours[/hide_on_us] as you sing. You can even invite a student to come up to the board and touch the [hide_on_uk]colors[/hide_on_uk][hide_on_us]colours[/hide_on_us] with you. Next, give out all 7 [hide_on_uk]colors[/hide_on_uk][hide_on_us]colours[/hide_on_us] (e.g. [hide_on_uk]colored[/hide_on_uk][hide_on_us]coloured[/hide_on_us] paper, pencils, etc.) to each student. Get each student to lay out the [hide_on_uk]colors[/hide_on_uk][hide_on_us]colours[/hide_on_us] in front of him/her, in the order of the song. As you pay the song again, have all students touch each [hide_on_uk]color[/hide_on_uk][hide_on_us]colour[/hide_on_us] and sing along.
Lyrics for “The rainbow song”
Verse 1:
Red and yellow and pink and green,
Purple and orange and blue.
I can sing a rainbow,
Sing a rainbow,
Sing a rainbow too.
Verse 2:
Red apples and yellow sun,
Pink flowers in the green grass.
Purple grapes and orange carrots,
A rainbow high in the blue sky.
Verse 3:
Red and yellow and pink and green,
Purple and orange and blue.
I can sing a rainbow,
Sing a rainbow,
Sing a rainbow too.
Gestures for “The rainbow song”
There are a number of activities you can do as you sing along to the song:
- Simply pat your knees or clap in time with the music as you sing the song.
- Give each student a print out of The rainbow song song poster. As they sing along they touch each [hide_on_uk]colors[/hide_on_uk][hide_on_us]colours[/hide_on_us] or picture.
- Give out the 7 [hide_on_uk]colors[/hide_on_uk][hide_on_us]colours[/hide_on_us] to students ([hide_on_uk]colored[/hide_on_uk][hide_on_us]coloured[/hide_on_us] paper, origami paper, [hide_on_uk]colored[/hide_on_uk][hide_on_us]coloured[/hide_on_us] blocks, [hide_on_uk]colored[/hide_on_uk][hide_on_us]coloured[/hide_on_us] pencils – anything will do) and have students touch the [hide_on_uk]colors[/hide_on_uk][hide_on_us]colours[/hide_on_us] in time with the song.
- Put [hide_on_uk]colored[/hide_on_uk][hide_on_us]coloured[/hide_on_us] paper up around the walls of the classroom. Have all of your students point to each [hide_on_uk]color[/hide_on_uk][hide_on_us]colour[/hide_on_us] as it is sung.
[hide_on_uk]Short sample (members get full-length song):
[/hide_on_uk]
[hide_on_us]Short sample (members get full-length song):
[/hide_on_us]
7. Read classroom reader “What [hide_on_uk]color[/hide_on_uk][hide_on_us]colour[/hide_on_us] am I?”
This classroom readers ties in perfectly with The rainbow song. Before class, download and print off the reader “What [hide_on_uk]color[/hide_on_uk][hide_on_us]colour[/hide_on_us] am I?”. As you go through each page, point to the pictures and let your students shout out what [hide_on_uk]color[/hide_on_uk][hide_on_us]colour[/hide_on_us] it should be:
Teacher: What is this? (pointing at the black and white apple on page 1)
Students: It’s an apple!
Teacher: Yes, that’s right! (reading from the story) “I am an apple. What [hide_on_uk]color[/hide_on_uk][hide_on_us]colour[/hide_on_us] am I?”
Students: Red!
Teacher: Let’s check … (turning the page) … Right! Good job! (reading from the story) … “I am red”. Can you point to something red in the classroom?
Students: (pointing to red things in the classroom)
Teacher: Yes, that’s right! Red (books) and a red (T-shirt) … (goes through all the red things students are point at).

Get the students really involved in the story by asking lots of questions (e.g. eliciting the objects and their [hide_on_uk]colors[/hide_on_uk][hide_on_us]colours[/hide_on_us]) and getting everyone to point to [hide_on_uk]colors[/hide_on_uk][hide_on_us]colours[/hide_on_us] in the classroom.
After reading the story, give out a reader worksheet to each student and read through the story one more time (without stopping for questions, etc.) as students [hide_on_uk]color[/hide_on_uk][hide_on_us]colour[/hide_on_us] in the objects from the story. Check to make sure that everyone is using the correct [hide_on_uk]colors[/hide_on_uk][hide_on_us]colours[/hide_on_us].
Alternatively, watch our video version of the reader (Internet connection required).
8. Do “[hide_on_uk]Colors[/hide_on_uk][hide_on_us]Colours[/hide_on_us] of the rainbow” worksheet
To finish off this section of the lesson, give out the worksheets. As your students are doing the worksheets, ask questions (e.g. “What [hide_on_uk]color[/hide_on_uk][hide_on_us]colour[/hide_on_us] is that?”, etc.).
Wrap up:
Assign homework: “Cup cake [hide_on_uk]color[/hide_on_uk][hide_on_us]colour[/hide_on_us]!” worksheet
Click for wrap up suggestions for the end of your lessons
1. Assign homework
Each week give out a homework worksheet for your students to take home. Hold up the homework worksheet and model how to do it. Give out the worksheets and say, “Put your homework in your bags” and help them to do so – this is important as they will probably want to start [hide_on_uk]coloring[/hide_on_uk][hide_on_us]colouring[/hide_on_us] them right away.
If possible, encourage the parents to help out as much as possible with their child’s homework – it is a great way to have your students practice the target language outside of class.

2. Say goodbye to glove puppet
Take out the bag again and get everyone to wake up the glove puppet by shouting its name into the bag (e.g. “Cookie Monster!”). Bring out the puppet and go through the same routine – go to each student and say hello, ask their name and the say goodbye / see you. Then put the puppet back in the bag (back to sleep).
3. Sing the “Goodbye song”
The “Goodbye song” is a great way to sign off the class. Sit together in a circle and sing and clap along. You can also use a different song, especially if your students love a particular song.
Lyrics for the “Goodbye song”
Goodbye, goodbye,
See you again.
Goodbye, goodbye,
See you again.
It’s time to go,
It’s time to go,
It’s time to go,
See you next time.
Goodbye, goodbye,
See you again.
It’s time to go,
See you next time.
Gestures for the “Goodbye song”
These are quite straight forward. First time you play the song do the gestures and encourage everyone to do them with you.
- Wave as you sing the “Goodbye, goodbye” parts.
- Hold your hand above your eyes (as you would when you are looking into the distance and keeping the sun out of your eyes) and look at another student as you sing, “See you again”.
- Tap watch (or imaginary watch) and then point to the door as you sing, “It’s time to go”.
- Point towards another student as you sing, “See you next time”.
[hide_on_uk]Short sample (members get full-length song):
[/hide_on_uk]
[hide_on_us]Short sample (members get full-length song):
[/hide_on_us]
4. Do “Quick check” and say goodbye
Time to leave the class. Make sure everything is put away and the students have gathered their belongings. Have them line up at the door and place yourself between the door and the students. For each student check one new word or phrase, for example:
- hold up an object or flashcard (such as a [hide_on_uk]color[/hide_on_uk][hide_on_us]colour[/hide_on_us] or fruit) and ask, “What’s this?”
- say an action for the student to do (e.g. “Roar like a lion”, “Jump 5 times”, etc.)
- ask a question from the lesson (e.g. “How old are you?”, “Do you like bananas?”, “Can you play chess?”, etc.).
- for very young students you can hold up one of the worksheets you did in the lesson and ask them to touch an object (e.g. “Touch the melon”).
When they give you the correct answer say goodbye and let them leave. If their answer is wrong, have them go back to the end of the line – they will have to try again once they reach the front!
Other lesson plans
Actions, verbs & tenses:
- Can – for ability
- Morning routines
- Daily routines & times of the day
- Actions – Present continuous
- Future plans using “going to”
- Past tense activities – Regular verbs
- Past tense activities – Irregular verbs: Part 1
- Past tense activities – Irregular verbs: Part 2
Adjectives:
- Describing people
- Describing things
- Comparing things (Comparative adjectives)
- Comparing things (Superlative adjectives)
Adverbs:
Alphabet:
Animals:
Body:
Classroom:
Clothes:
Colors:
Colours:
Directions:
Family:
Feelings & emotions:
Food:
Health & sickness:
Holidays & festivals:
Jobs:
Likes, dislikes & favorites:
Likes, dislikes & favourites:
- Likes & dislikes
- [hide_on_uk]Favorites[/hide_on_uk][hide_on_us]Favourites[/hide_on_us] and asking why
Nature & Our world:
Numbers:
Places & where we live:
Prepositions of location:
Pronouns:
Shapes:
Shopping:
Sports:
Time, days, months, seasons:
Toys:
Transport & travel:
Weather: